👕 What is Garment Pattern Grading? A Core Concept in Apparel Manufacturing
Pattern grading is a technical process essential to the clothing industry. It involves scaling a base or master pattern to create a full range of different-sized patterns, all based on predefined pattern grading charts.
This process is utilized by clothing manufacturers to produce ready-to-wear clothing in a variety of sizes. To grade a pattern means strategically altering its dimensions at specific measurement points—making each new pattern consistently larger or smaller than the original, without distorting the design’s overall aesthetic or shape. This can be executed manually or digitally using a computer.
The Methodology: How to Grade Patterns Effectively

Pattern grading is essentially the method of incrementally adding to or subtracting from a master pattern piece to achieve the necessary size range. You can begin grading from the smallest size, the largest size, or a middle size (often a medium). Crucially, while pattern grading changes the overall dimensions of a design, it is engineered to preserve its original proportions, look, and intended silhouette.
Pattern size construction heavily relies on pre-established grading rules, especially when integrated into advanced Computer-Aided Design (CAD) systems. When customers demand various sizing options, manufacturers must apply grading rules to scale the base size (e.g., 10 or M) to accommodate sequential sizes labeled with letters such as XS, S, L, XL, and XXL. For instance, if the prototype is size 10 (M), the pattern must be scaled up to fit sizes 12 (L), 14 (XL), and 16 (XXL), and scaled down for sizes 8 (S) and 6 (XS). Pattern grading is a fundamental and indispensable skill across the entire clothing business and fashion designing industries.
The Critical Importance of Pattern Fluidity and Grading
Maintaining pattern fluidity is vital for continuous progression in fashion design. Without the practice and skill of grading, a fashion designer’s ability to evolve their collections is limited. Patterns that can be easily modified and scaled enable fashion houses to create diverse product lines featuring a variety of designs that share a similar core concept and fit. This consistency is what allows a brand to be recognized across its entire product offering.
Core Techniques for Garment Pattern Grading

When grading clothing patterns, two primary systems are employed by pattern graders:
1. Manual Pattern Grading (Traditional Methods)
In manual grading, marks are drawn around the master pattern at precise distances corresponding to the size change. These marks are then connected to produce a new, larger or smaller pattern, ultimately creating a “pattern set” or a complete series of templates for all sizes.
- Grading Machine: This specialized tool simplifies the manual process. It grips the base pattern and accurately moves it by a precise, small amount in both vertical and horizontal directions, allowing the user to trace the new edge for the next size.
Primary Manual Grading Techniques:
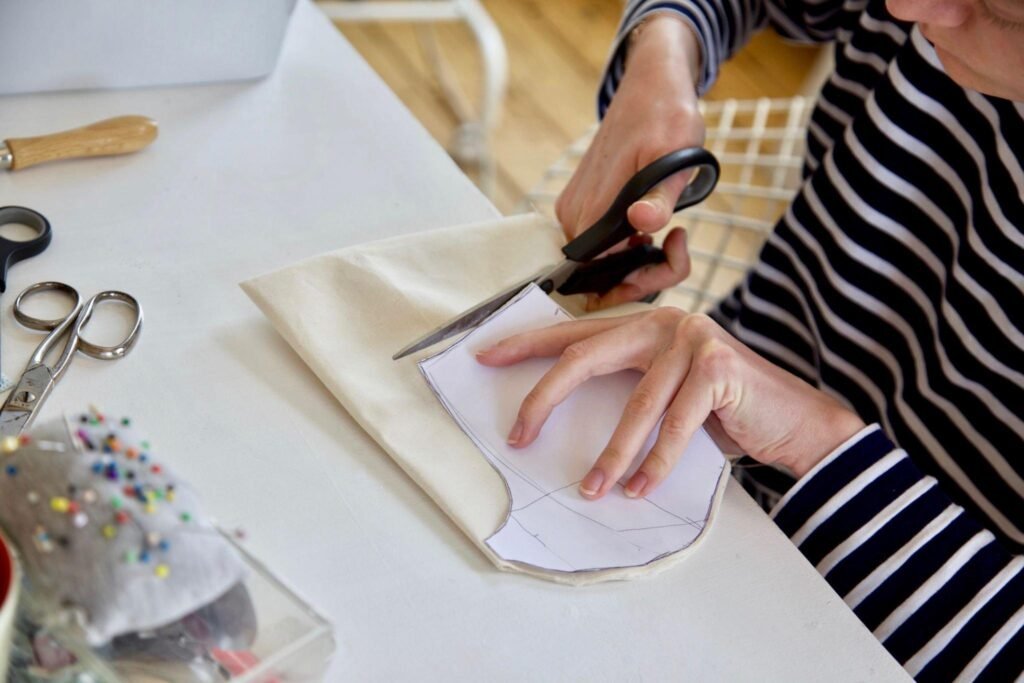
- Cut and Spread: The original master pattern is traced onto paper. The pattern is then physically cut into pieces along the necessary axes (often vertical), and the segments are spread out by a calculated amount to grade up a size. To grade down, the pieces are carefully overlapped. This method primarily requires basic tools like scissors, rulers, and measuring tape.
- Pattern Shifting: This method involves physically moving the master pattern up/down and left/right by specific grade rule amounts using a pattern grading ruler. Fashion designers trace the new outlines onto fresh paper to achieve the desired size increase (making it bigger) or trimming the edges to achieve a size decrease (making it smaller). The outcome is the same as the cut-and-spread method but without physically altering the master pattern.
2. Computer-Aided Pattern Grading (CAD)
Computed grading (CAD) is the fastest and most accurate method today. Initially exclusive to large apparel companies, CAD software is now more accessible. This digital approach allows every clothing manufacturer for small businesses to quickly obtain highly precise and detailed patterns.
- Grading increments are input directly into the computer system.
- The software automatically generates all different sizes using algorithms that mimic the manual grading methods.
The resulting “nest of patterns” can be viewed on screen for inspection and minor adjustments. Once finalized, the pattern set is utilized in various ways:
- In fully automated systems, parts are sorted and integrated into a lay plan, which is sent as a control program to automatic laying and cutting machinery.
- Alternatively, patterns can be sent to a large plotting device to be drawn at full scale for manual hand-cutting.

Defining Grade Specs and Grade Rules
Grading Specifications (Grade Specs) are the measurements that dictate exactly how much each size should increase or decrease from the master size. They communicate the size change requirements to the factory. The Grading Rule specifies the exact amount each Point of Measurement (POM) is scaled up or down. The main objective of the grade rule is to ensure that the manufactured garment maintains an excellent fit and balanced shape across the entire size range.
Developing Grade Rules and Specs
Your specific grading rule will be determined by the garment style. For instance, athletic wear patterns require sufficient ease for movement, while a boxy garment will need extra room factored into each size to maintain its oversized fit.
Before creating grade specs, the sample size must be meticulously measured. Some measurements come from standard body charts, while others are derived from body measurements plus the necessary amount of garment ease.
Key Points of Measurement (POMs) include:
- Full garment length
- Chest, Waist, and Hip circumference
- Sleeve length and Neck width
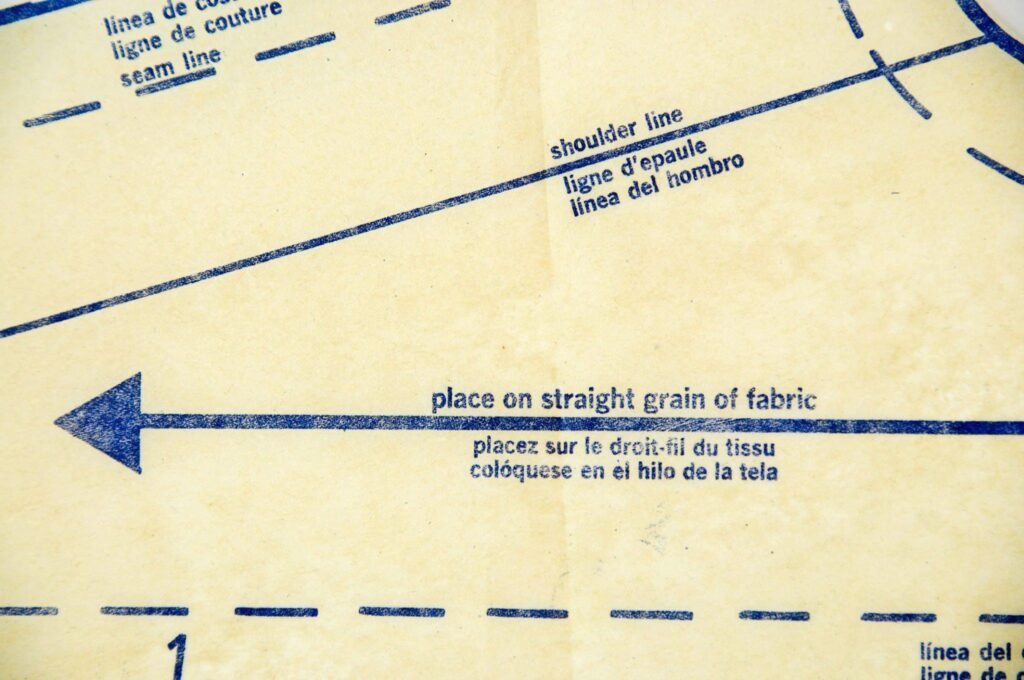
- Front neck drop and Across shoulder measurement
Once these POMs are established, the grade rule is applied to accurately determine the measurements for all sizes larger and smaller than the initial sample size.
The Practical Steps of Grading Between Sizes
To grade a pattern piece manually, a designer typically draws a line between the notches where the size must be altered. Consistency is paramount: all corresponding pieces must be changed in the same manner to ensure seams still align perfectly after the grading process. Modern Tech Pack Design software can dramatically expedite this process, calculating measurements for all sizes quickly based on input garment measurements or pre-set grading rules.
The Role of Grading in Fashion Design
Gradation in fashion design imparts meaning and purpose to the overall garment creation process. It allows designers to apply a specific pattern or aesthetic theme to a wider range of clothing designs. Grading patterns help establish a cohesive line of clothes that, while varying in size, all share the same underlying structure and pattern. This ability is essential for a designer to create a marketable fashion line that caters to diverse body types.
Designer Benefits Through Grading

Grading makes a high-quality pattern versatile and scalable. It also makes it easier to adjust a pattern as a person’s body changes over time. Imagine the value in using grading to maintain the fit and style of a child’s favorite dress pattern as they grow!
● Practical Application: The “Slash and Spread” Method
For grading up (making a size bigger), the part of the pattern requiring change is cut in both directions and spread out to the measurement of the new garment size before the new outline is drawn. When grading down, the cut pieces are overlapped instead of spread out.
● Practical Application: The Shift Method
Using the shift method, the shape of the pattern piece is moved outward or inward. The pattern outline is then redrawn to create the new size. CAD software significantly streamlines these processes, providing a smooth workflow for pattern creation, sizing, and calculating fabric consumption and shrinkage.
A 5-Step Overview of the Pattern-Making Process

Pattern-making is the specialized craft of translating a 2D design concept onto paper or fabric to achieve a perfect, custom fit for the human body. It forms the foundation of the entire garment, dictating precisely where the fabric must be cut. While techniques vary, the common method of flat pattern making involves these five key steps:
1. Gathering Essential Tools
A pattern maker relies on specific tools:

- Pencils and Erasers: Used for initial drafts, as frequent adjustments are necessary.
- Patterning Paper: Specialized paper, often marked with lines/grids, to save time on measurements.
- Flexible Rulers: Crucial for measuring and drafting contours and curved shapes.
- Hip and Arm Curves: Rigid, curved rulers used to accurately define rounded edges after initial straight lines are sketched.
- Straight Gridded Rulers: Essential for measuring length, width, and height with precision.

2. Taking Careful Body Measurements
Patterns are made either for a specific client (custom fit) or for a standard size range. Accurate measurements—including height, bust, waist, hip, arm, rise, and in-seam—are vital for a perfect fit.
3. Adding Designs and Stylistic Elements
The initial pattern draft is based on body dimensions, but design features—like flared sleeves—are added to make the garment stand out and make a fashion statement. Designers must always balance style with the intended fit and wearability.
4. Evaluation and Pattern Sizing (Grading)
Grading is the core process of adapting the same base paper pattern to fit different sizes efficiently. For quick size changes in consumer markets, paper grading (manual or digital) allows for rapid reduction or increase of the template. Pre-marked patterning papers simplify the tracing and scaling process.

5. Moving On to Draping (3D Visualization)
After the 2D pattern is finalized on paper, it must be translated into a 3D form for final adjustments and to visualize how it will fit the body. Draping involves drawing the pattern onto fabric, cutting it out, and temporarily stitching it together on a mannequin (or model) to see the desired look and fit.

✔ Conclusion: The Final Word on Pattern Grading
While creating a single garment design is an achievement, ensuring that design can be worn by a wide consumer base is the ultimate goal. Unlike textile manufacturers who focus purely on material, pattern designers must be creative, precise, and administratively proficient. The singular responsibility of the pattern maker—and specifically pattern grading—is to guarantee that the sophisticated designs on paper translate flawlessly into high-quality, perfectly fitting fabric garments in the real world.
❕ Frequently Asked Questions (FAQ) About Pattern Grading
Q1: How does pattern grading differ from pattern making?
A: Pattern making is the art of creating the original, base pattern from a 2D design. Pattern grading is the technical process of scaling that completed base pattern up and down to create a full set of patterns in different sizes (XS, S, M, L, etc.) without changing the design’s shape.
Q2: What are “Grade Rules” and why are they important?
A: Grade Rules define the exact measurement increments (e.g., 0.5 inches) that each Point of Measurement (POM) on a pattern must grow or shrink by between sizes. They are critical because they ensure the garment maintains a consistent fit and balanced silhouette across the entire size range.
Q3: What are the two main types of pattern grading techniques?
A: The two main methods are Manual Pattern Grading (which includes techniques like “Cut and Spread” and “Pattern Shifting”) and Computer-Aided Design (CAD) Grading, the latter being the fastest and most precise digital method.
Q4: Why do fashion designers need to know how to grade patterns?
A: Designers must know grading to ensure their creations can be produced for people with diverse body types. This skill allows them to create cohesive and marketable clothing lines that consistently convey the same design concept across all available sizes.
Q5: What is the benefit of using CAD software for pattern grading?
A: CAD software provides superior speed, accuracy, and detail compared to manual methods. It automates the calculation and drawing of all sizes, allows for easy visualization of the pattern nest, and integrates directly with automated cutting and manufacturing systems.