Coats—everyone loves them! They keep us warm and stylish, but making them is no simple task. Each coat starts with careful design and skilled hands, blending form and function into something truly special.
Blazers? They’re more lightweight and perfect for formal events. Built to withstand the elements, coats offer extra warmth that jackets simply can’t provide. Selecting the right garment depends heavily on understanding these differences.
This guide takes you through the fascinating world of coat manufacturing. Discover every step of the process, from fabric choice to final touches. Let’s get started and uncover the secrets behind creating the perfect coat!
Understanding coat manufacturing
Coats have stood the test of time, woven deeply into human history for centuries! Despite the common confusion between jackets and coats, they serve distinct purposes. Jackets typically finish at the hips, whereas coats often reach down to the mid-calf or even further. While some jackets might offer the coziness of a coat, coats remain the preferred choice for those seeking both warmth and style.
A coat is an outer garment designed for warmth and fashion. It typically features long sleeves and opens at the front. Fastenings vary, from buttons and zippers to belts and toggles. Coats adapt to trends, serving different functions and styles for everyone.
From ancient civilizations to the Renaissance and beyond, coats have evolved significantly. During wars and peacetime alike, they have been crucial for protection and style. Today, coat manufacturing is booming. Coats are more than practical—they’re a fashion statement and a mark of personal style.
Designing the perfect coat

Designing the perfect coat is more than just putting together fabric and patterns. It’s an art form that blends functionality with style. This journey from idea to finished garment is an exciting process.
Steps on designing a coat
1. Purpose and audience
Every coat needs a clear purpose. Are you crafting a coat for warmth, rain protection, or a fashion statement? Knowing this sets the foundation.
Next, consider who will wear it. Think about their age, gender, lifestyle, and the climate they live in. This helps in tailoring the design to meet their needs perfectly.
2. Inspiration quest
Explore fashion trends and revisit historical styles to spark inspiration. Mood boards work wonders—gather images, colors, textures, and styles that resonate. Remember, incorporating various elements and other factors can give your design that extra flair.
3. Concept creation
Sketch out your ideas to bring them to life. Focus on the coat’s silhouette and shape—whether fitted, oversized, or A-line. Details like collars, cuffs, pockets, and closures add charm, so don’t overlook them! These elements shape the coat’s character and functionality.
4. Design refinement
Now, refine your design with detailed sketches. Pay attention to proportions and specific features. Consider adding elements that make the coat versatile for different weather conditions, like removable linings or adjustable hoods.
Also, creating technical drawings will help in visualizing precise measurements and construction details. Choose a color palette that matches your inspiration and target audience. Finally, remember that fabric choice can be finalized later after discussing with your coat manufacturer.
5. Ready for manufacturing
Design in hand—now, it’s time to get ready for manufacturing. Discuss your ideas with a coat manufacturer, exploring all options and steps involved. They can guide you on the best practices, materials, and processes. Working together guarantees that your vision becomes a high-quality coat.
Creating a coat is an exciting journey—turning your ideas into reality and watching them come alive. Relish the process, enjoying every moment of crafting a coat that’s as functional as it is stylish!
Types of coats
Once your ideal coat is designed, selecting the right style is the natural next step. With countless options available, each style offers distinct features and serves its own purpose. Understanding the general types and terminologies can help narrow down the choices.
Before we dive into specific styles, let’s clarify some common coat types:
Overcoat

Source: Obroi
Long-sleeved and built for warmth, an overcoat typically extends below the knee, offering excellent cold-weather protection—a winter wardrobe essential.
Body coat

Source: Pinterest
Formal options like tailcoats, morning coats, and frock coats fall into this category. Meticulous tailoring and structured designs make them perfect for special occasions, adding a refined, elegant touch.
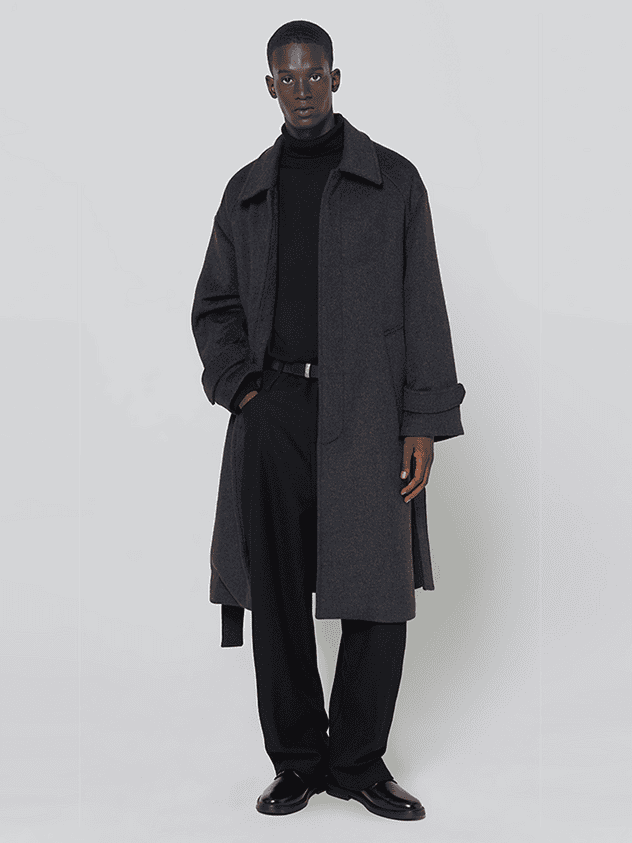
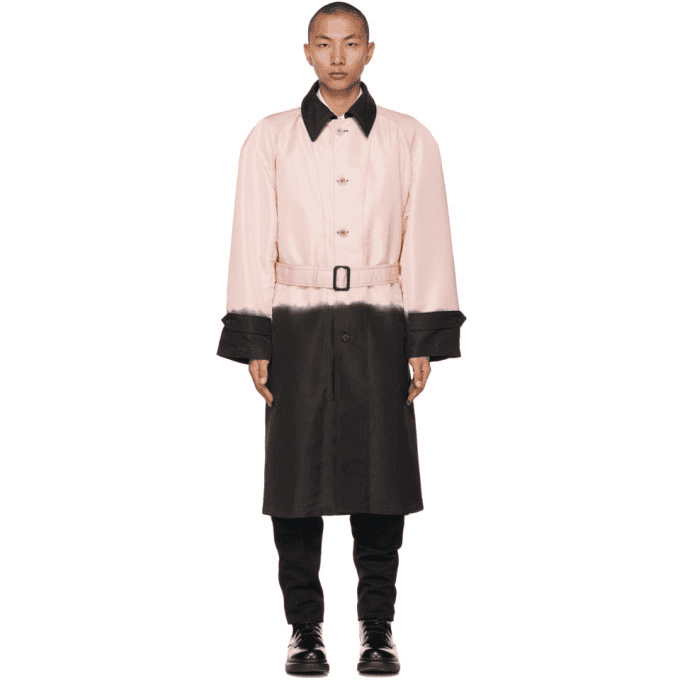
Topcoat
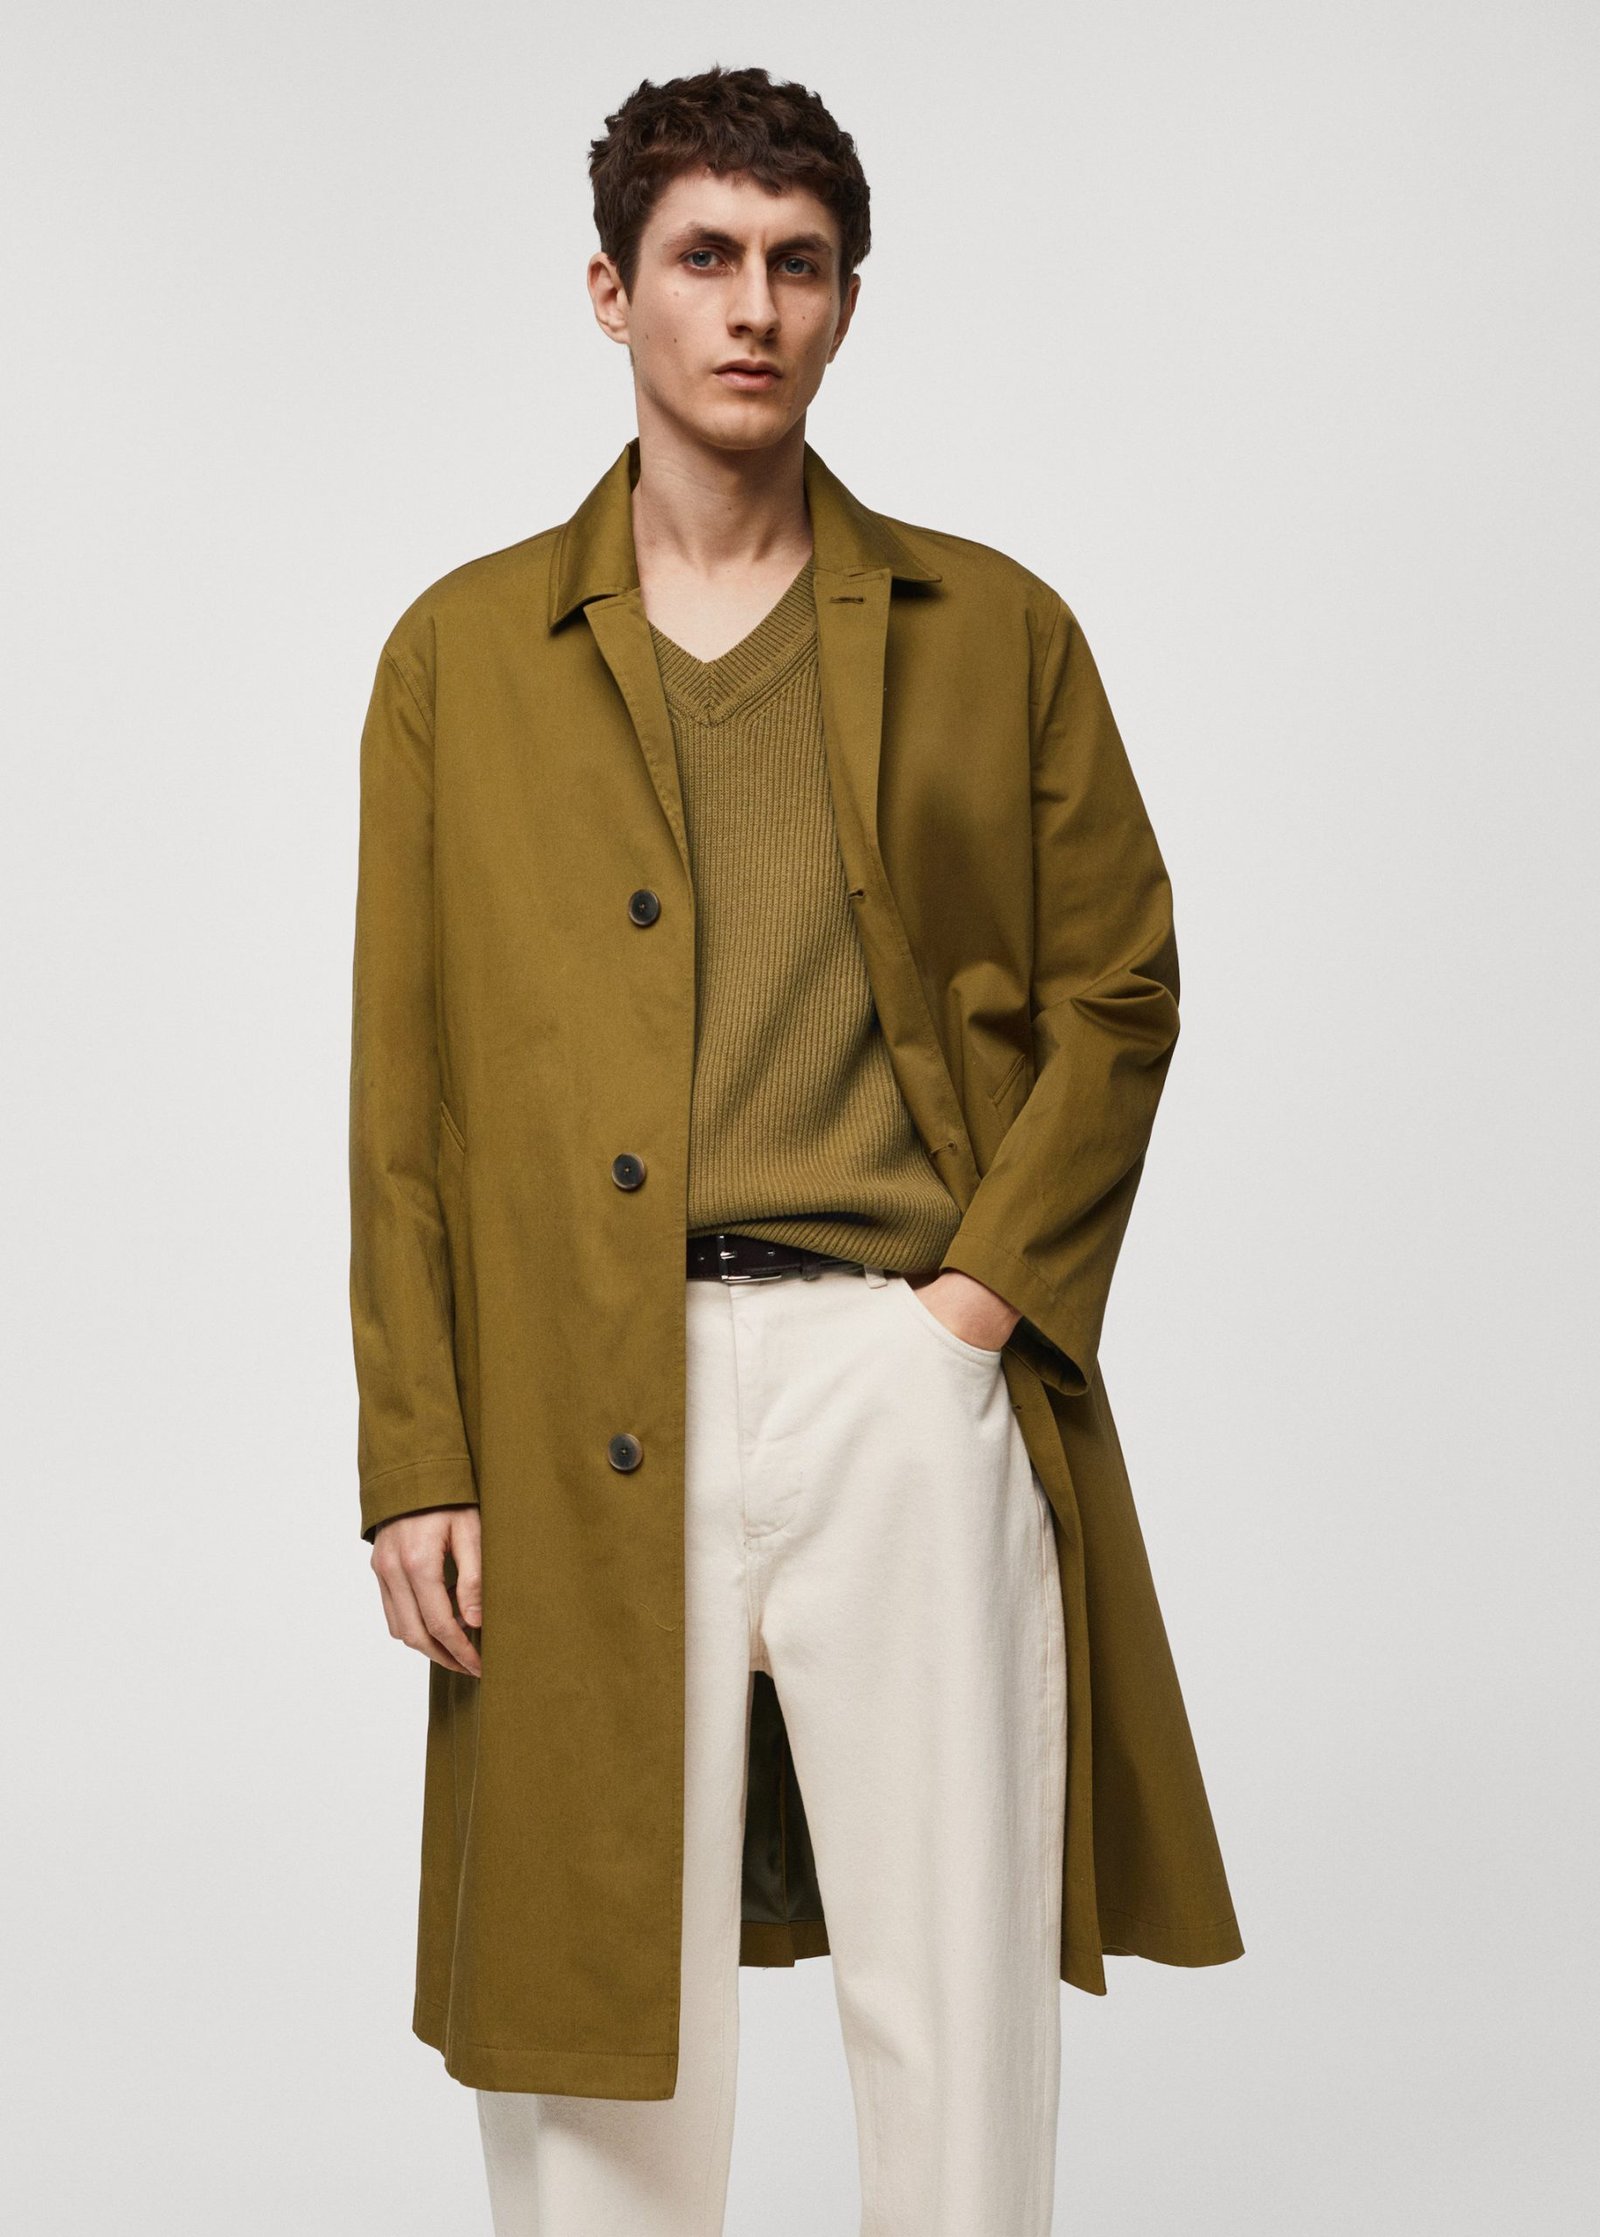
Source: Mango
Lighter than an overcoat, a topcoat uses thinner materials—ideal for milder weather. Styles like trench coats fit here, blending style with practicality for those in-between seasons.
Greatcoat
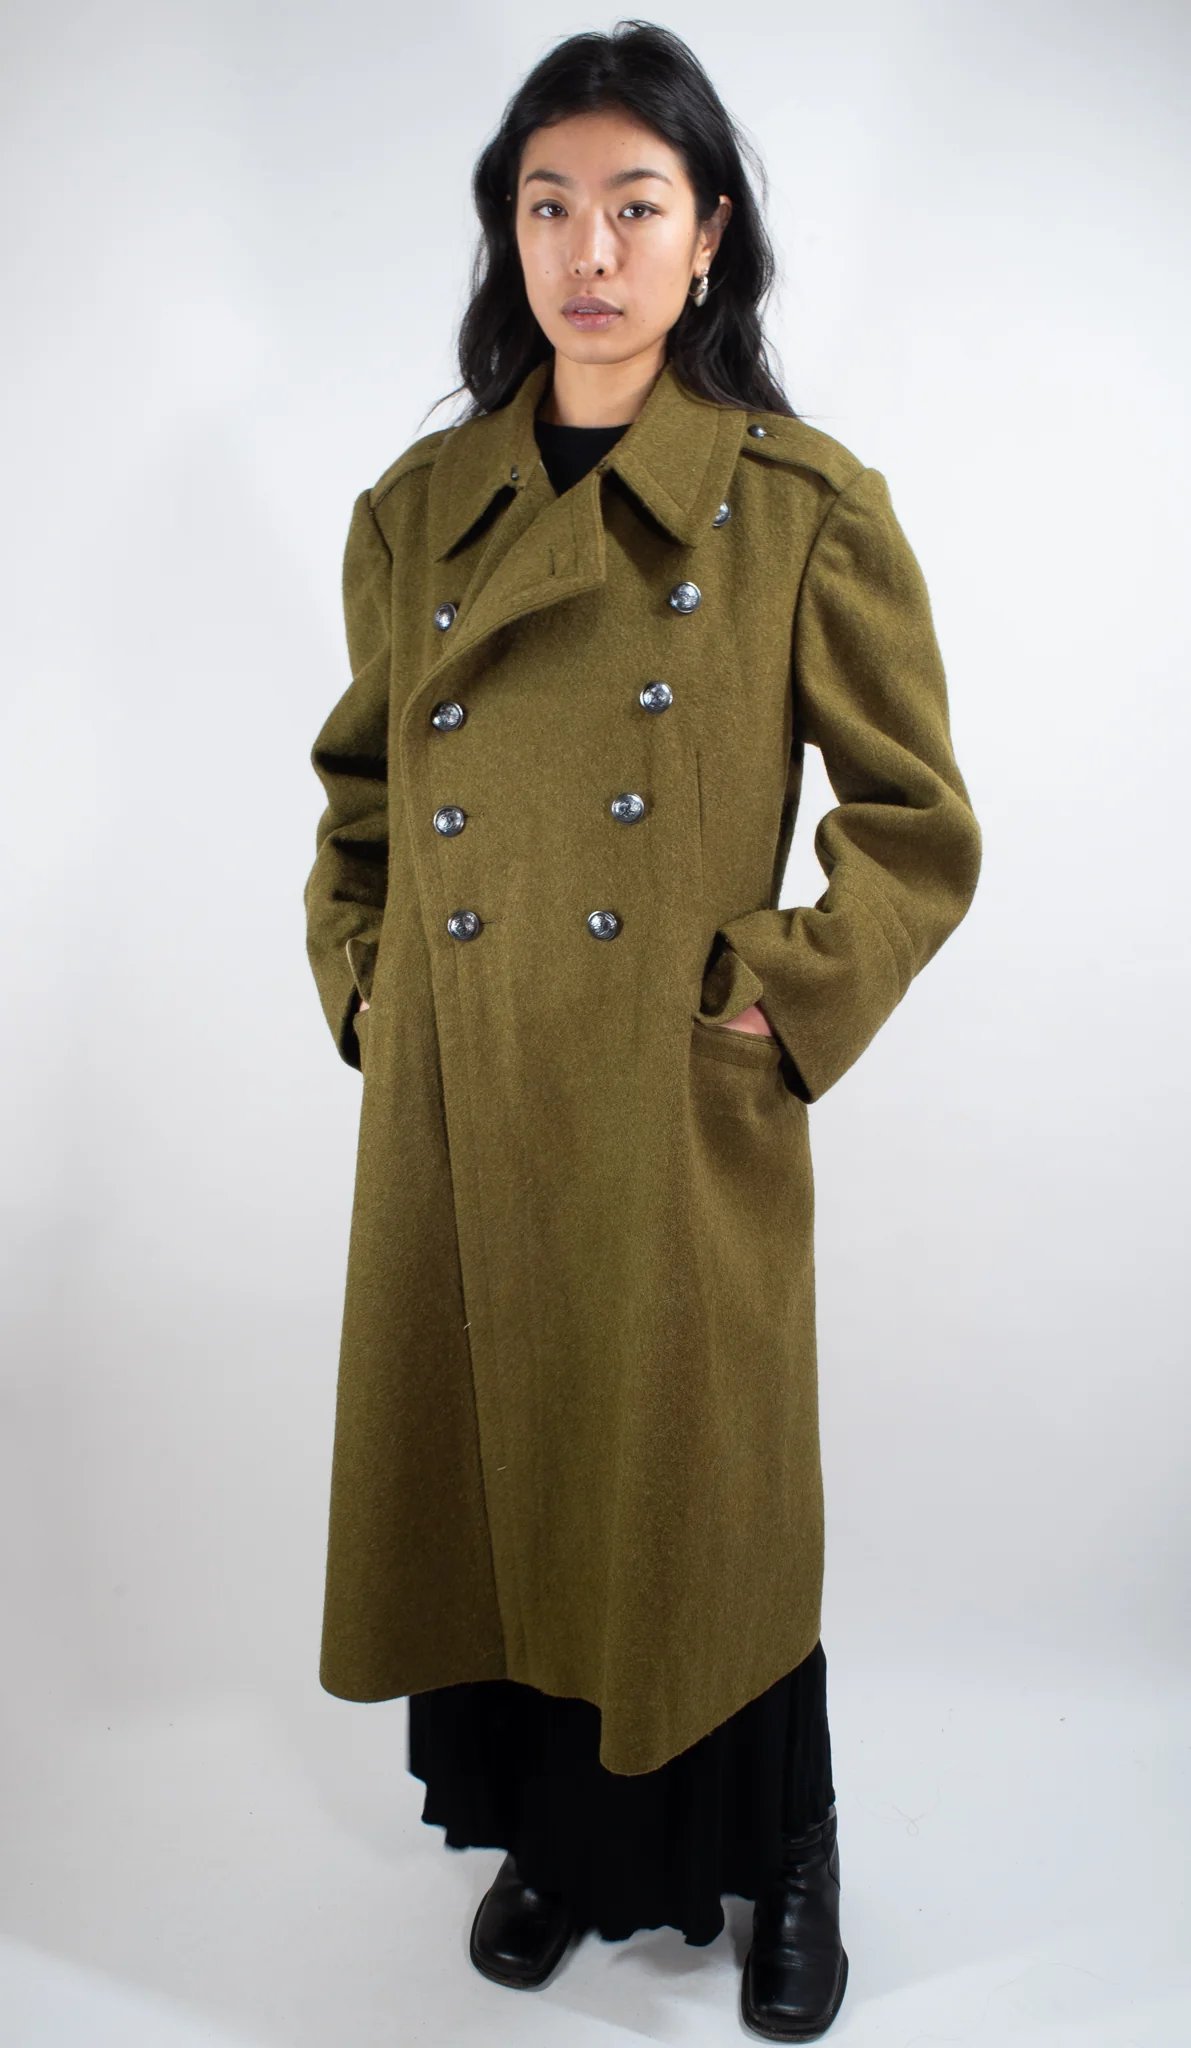
Source: Forces Uniform and Kit
Greatcoats are known for their heavy and bulky nature, designed to withstand extreme cold. With origins in military wear, they provide substantial warmth and protection, making them suitable for harsh weather conditions.
Having explored different coat categories, it’s time to delve into standout styles. Every coat presents unique features, tailored to diverse tastes and needs.
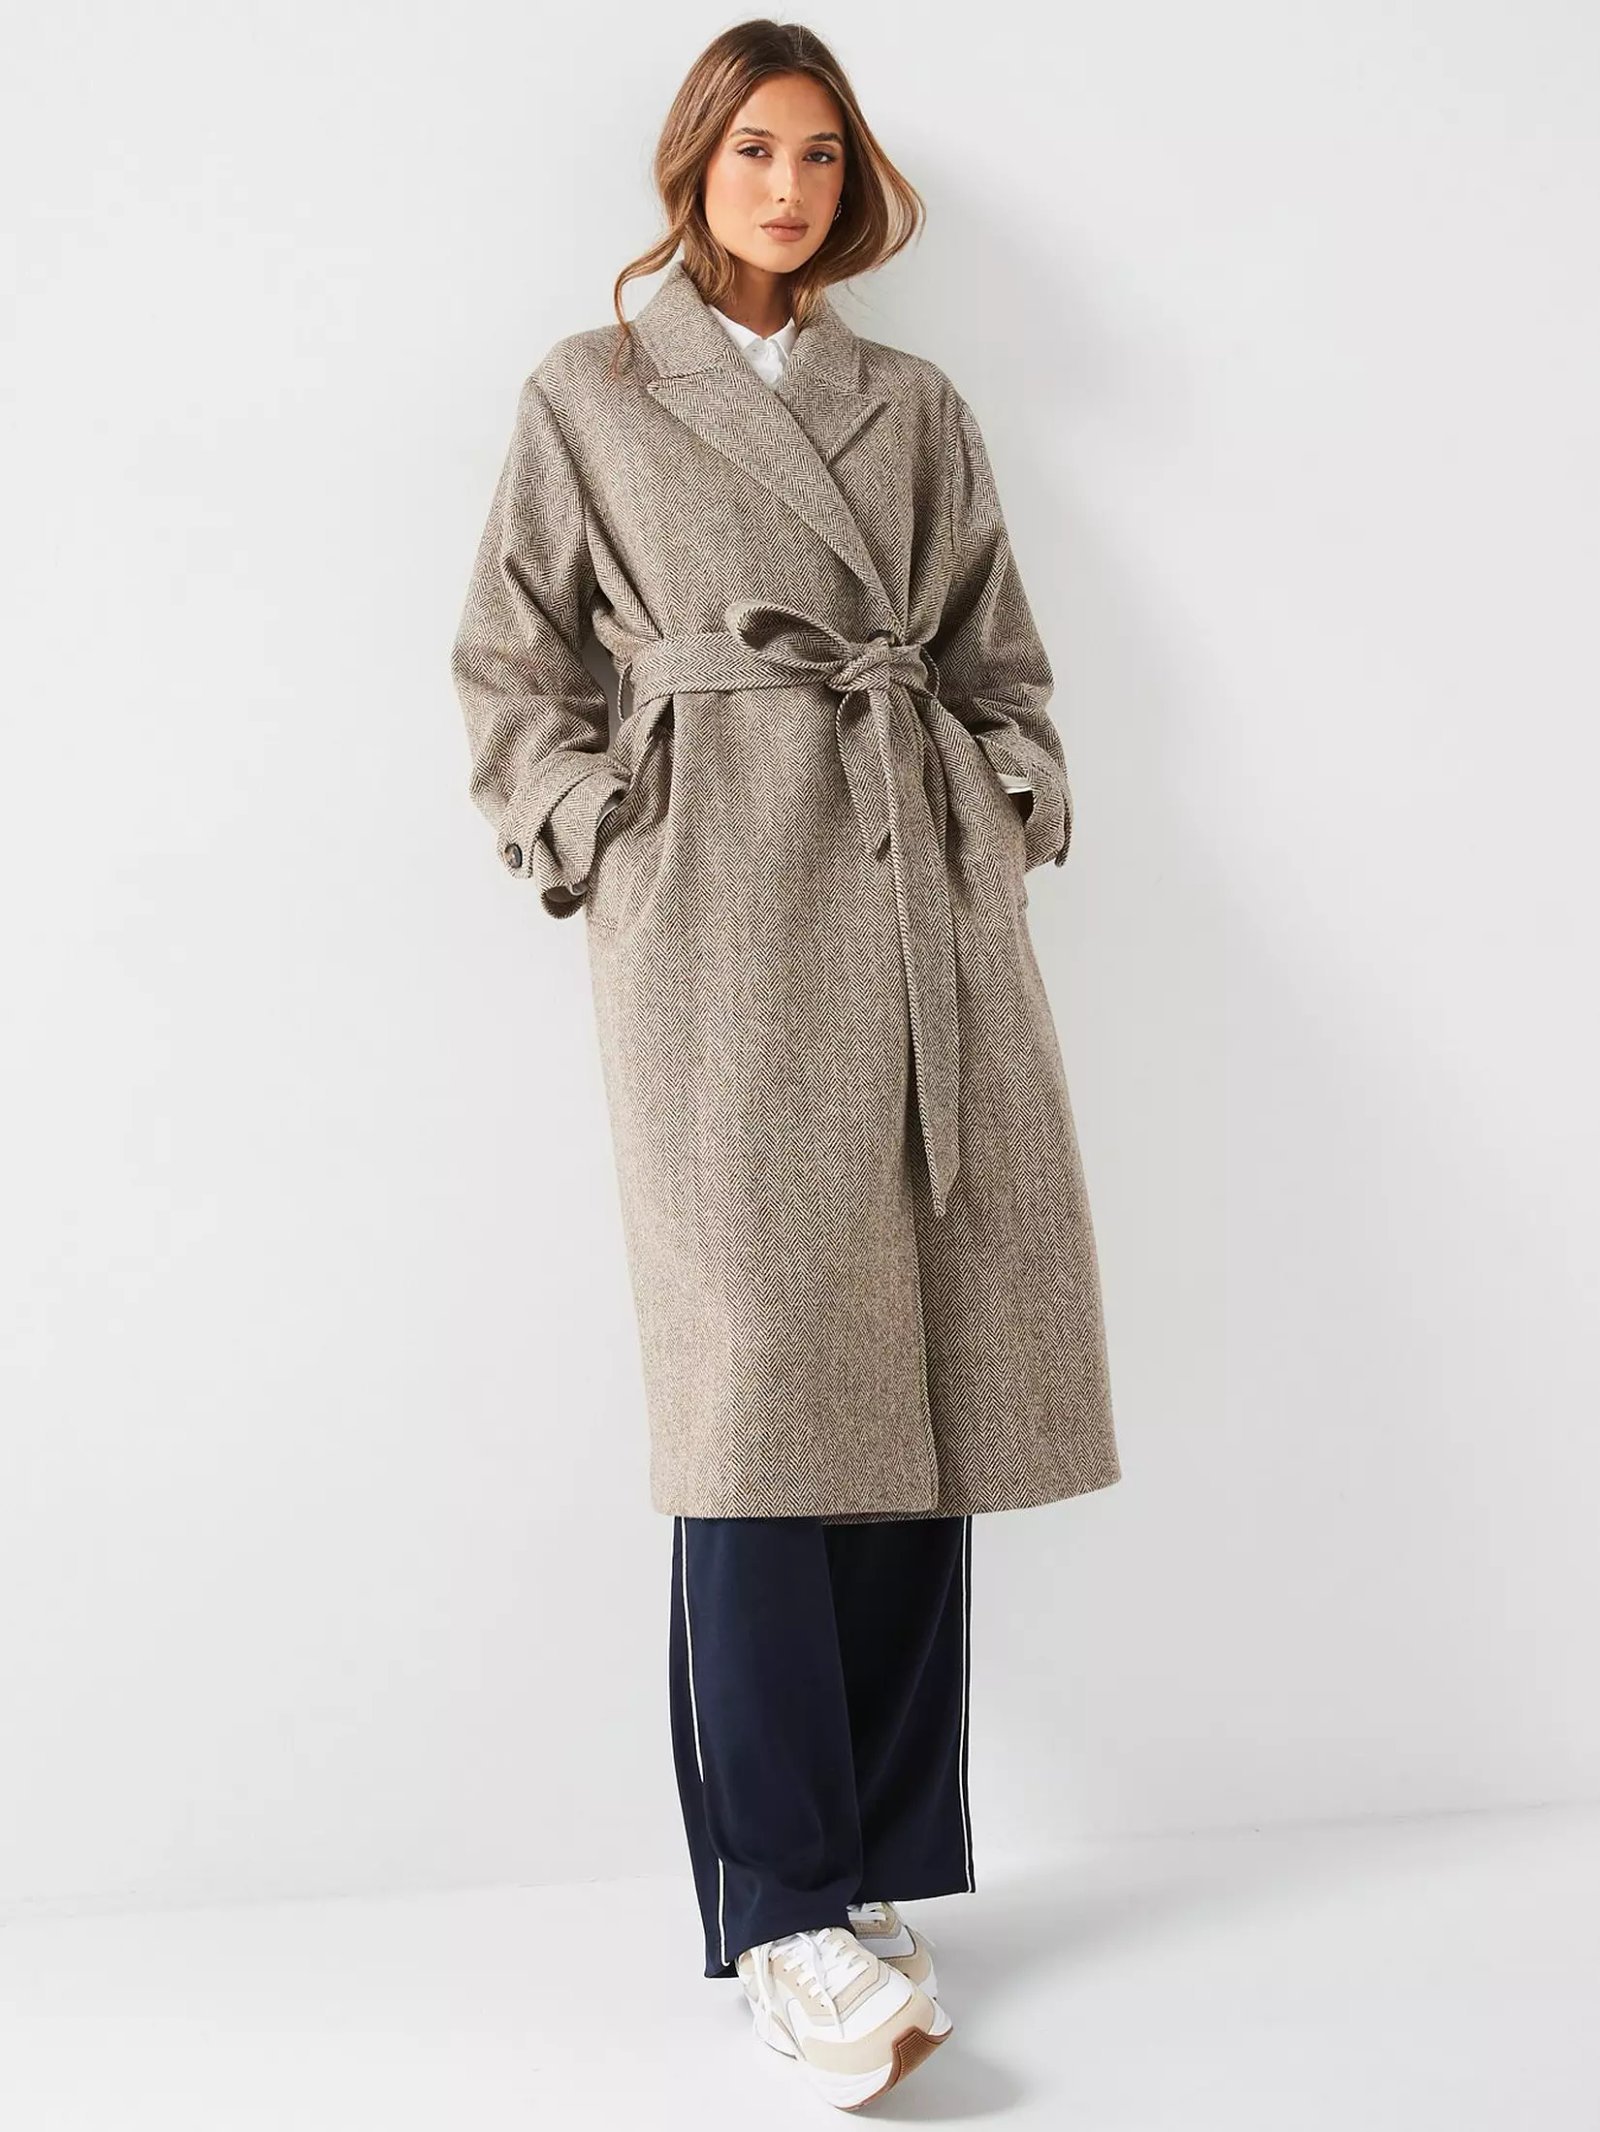
1. Balmacaan
Source: W Concept
Balmacaans offer a lighter, versatile alternative to overcoats, with a relaxed fit that pairs well with sweaters and trousers. Perfect for both casual and formal occasions, some even feature zip-out liners for all-season wear.
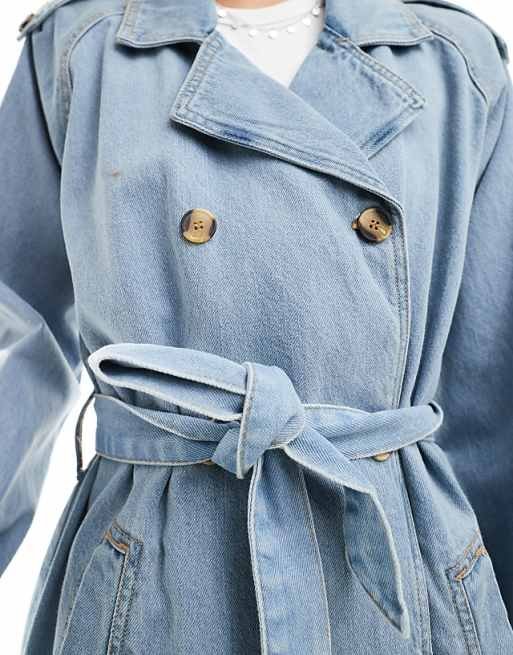
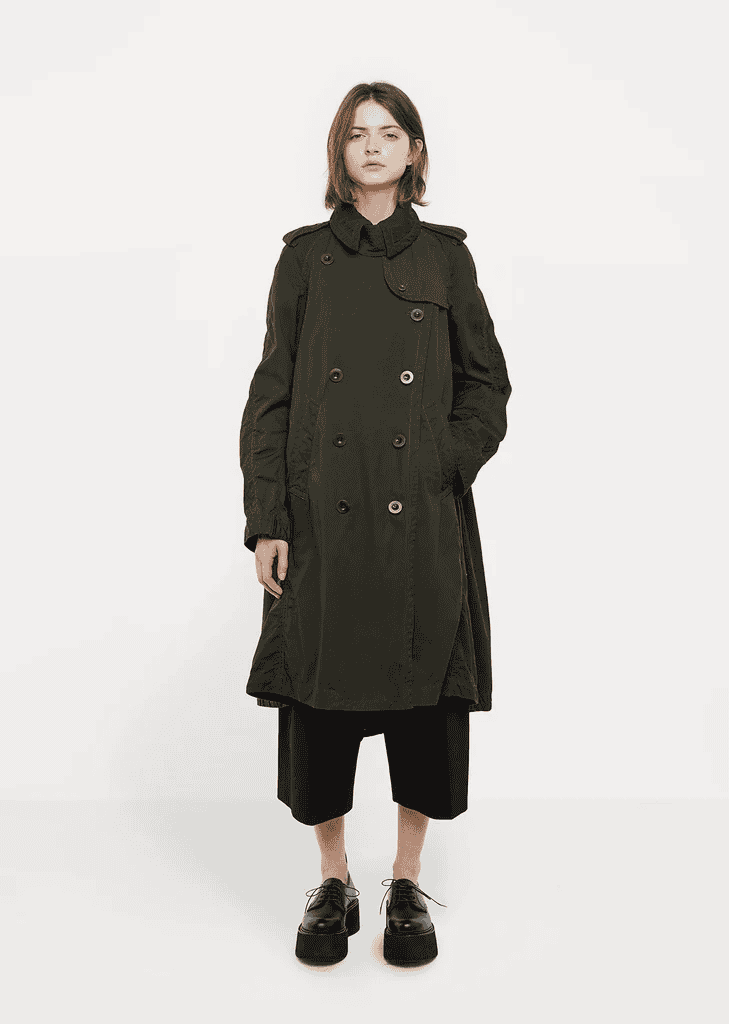
2. Trench coat
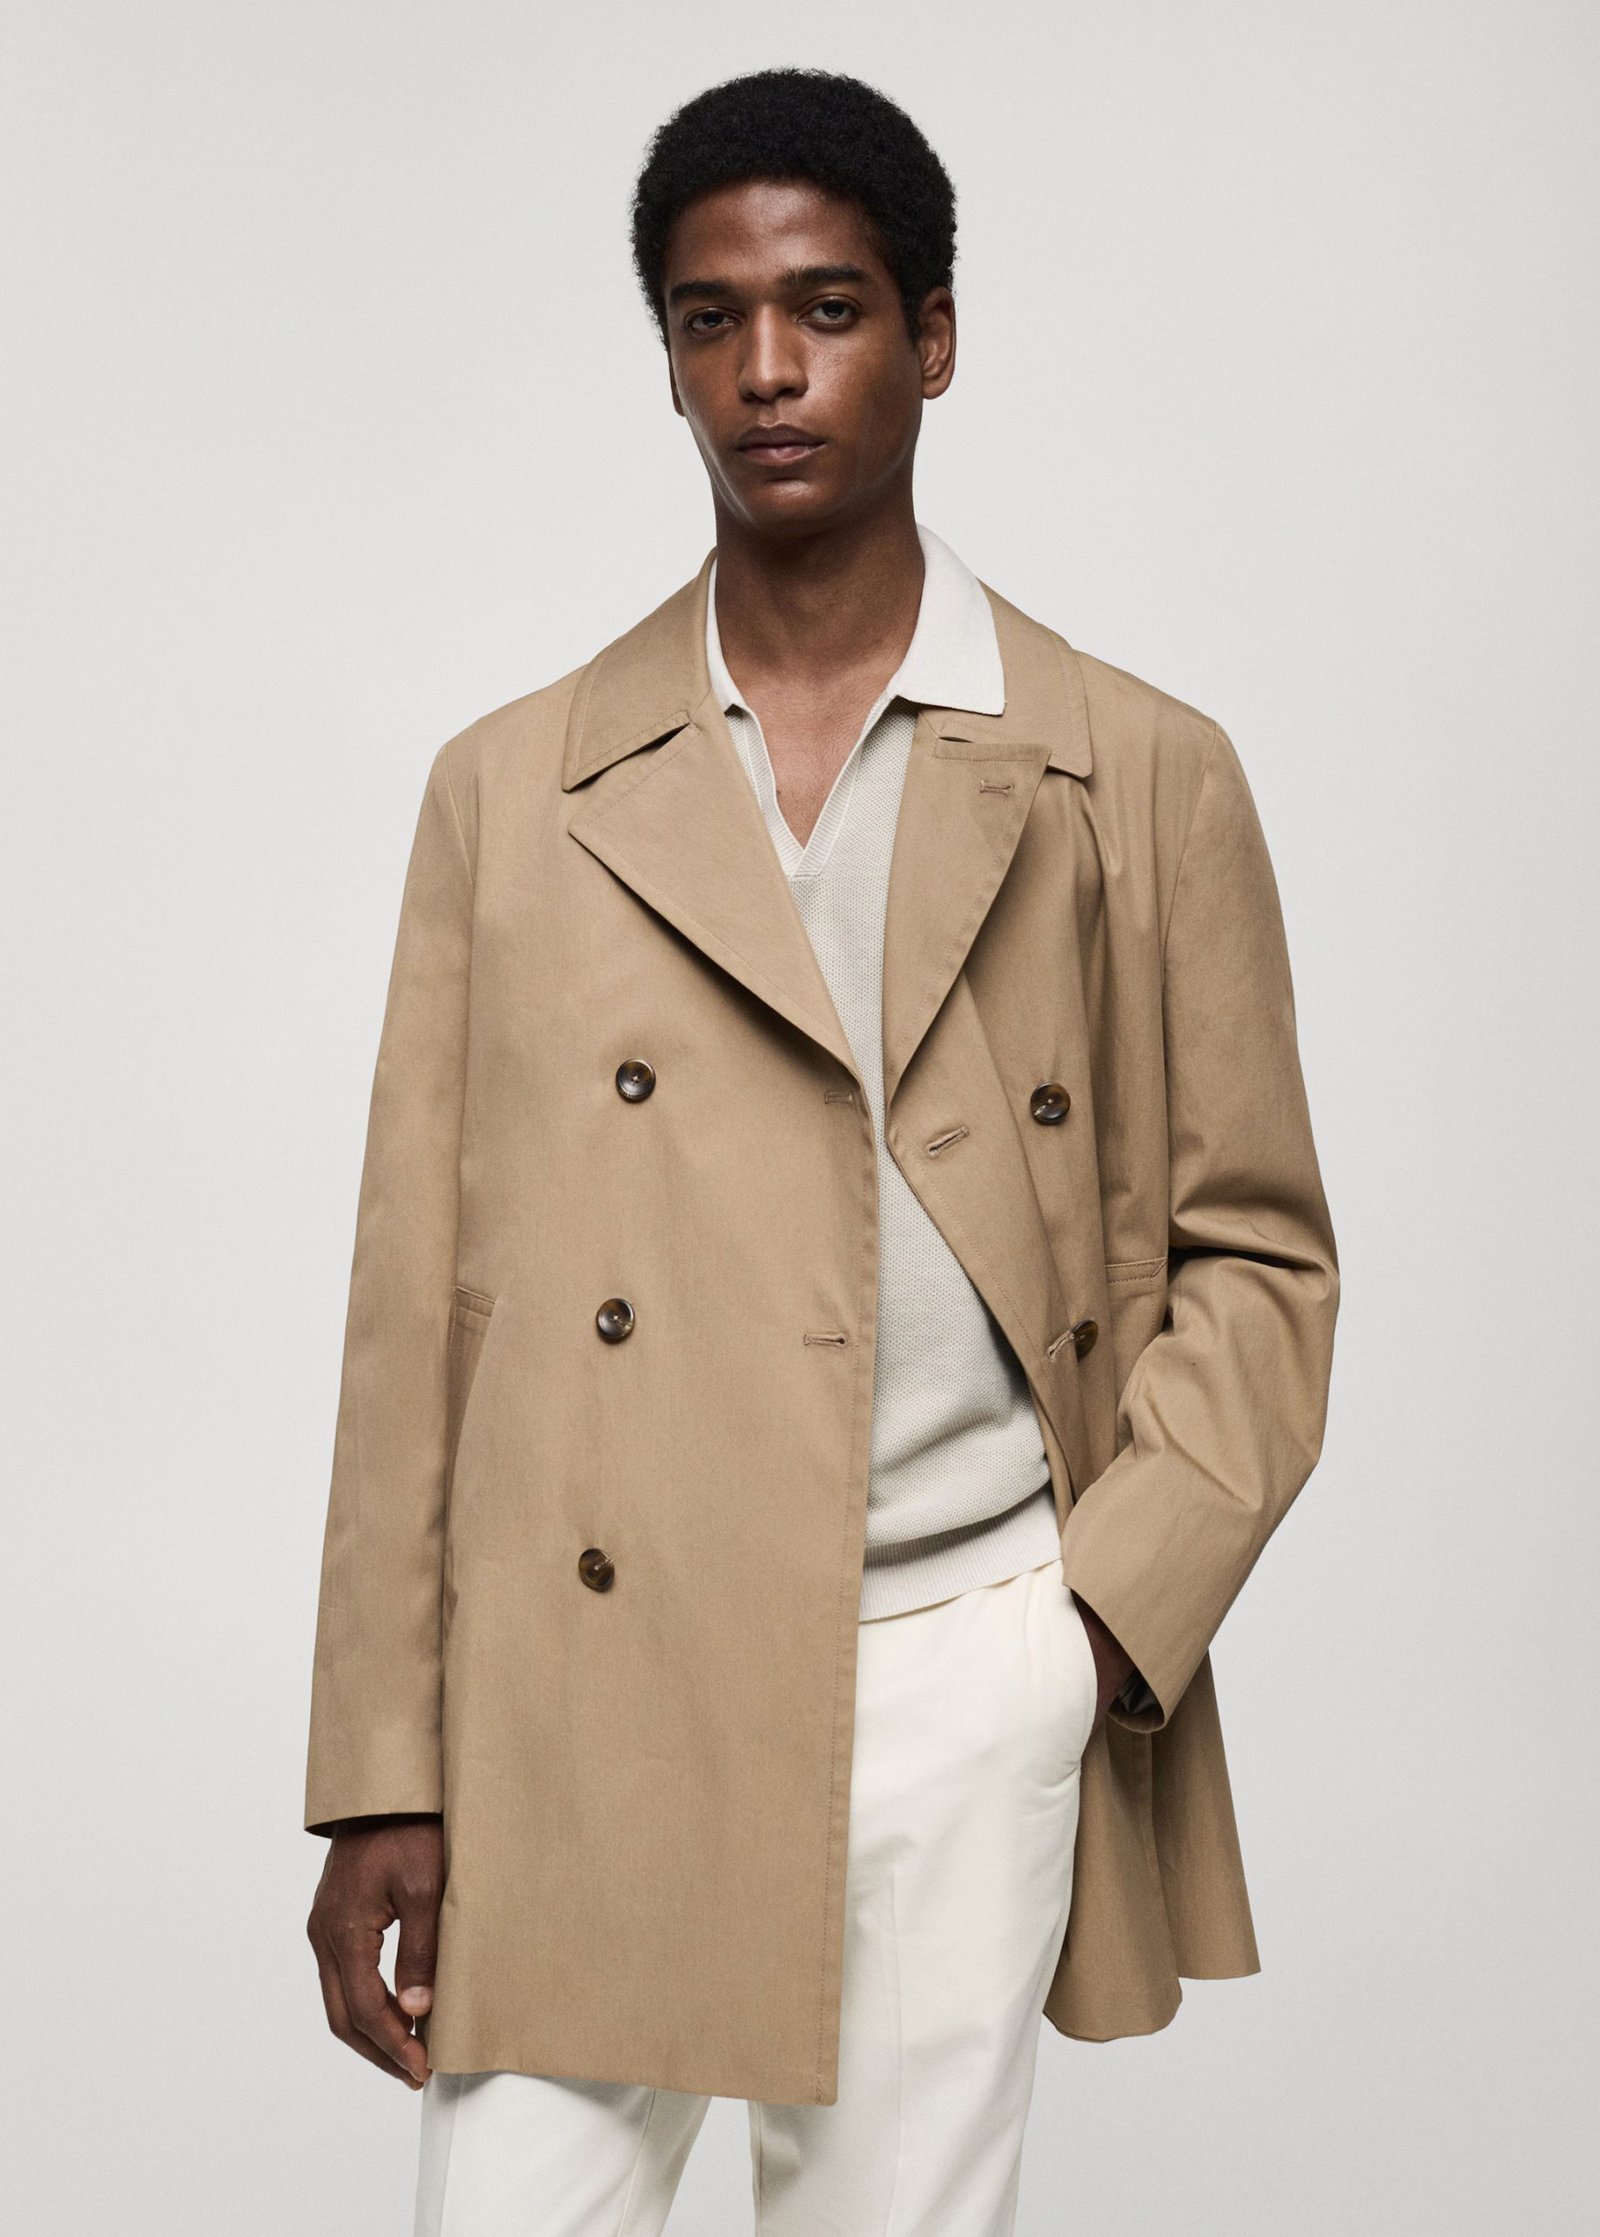
Source: Mango
Timeless icons, trench coats offer classic sophistication with double-breasted designs and waterproof fabrics. Originally donned by army officers, they’ve become stylish, functional staples for any weather.
3. Duster coat
Source: Very.co.uk
Long and loose, duster coats began as riding garments for dust and rain protection. Dramatic silhouettes elevate both formal and casual styles, infusing ensembles with a touch of grace.
4. Parka

Source: Pinterest
Tackle extreme cold with a parka—waterproof, fur-lined, and a reliable shield against snow and freezing temperatures. With roots in the Aleutian Islands, today’s parkas offer modern insulation, keeping you warm and cozy even in the harshest weather.
5. Peacoat
Source: Icicle
The peacoat exudes naval charm with its heavy wool, broad lapels, and large buttons. Once worn by navy crewmen, it’s a classic that combines warmth and style, perfect for those who appreciate a blend of tradition and function.
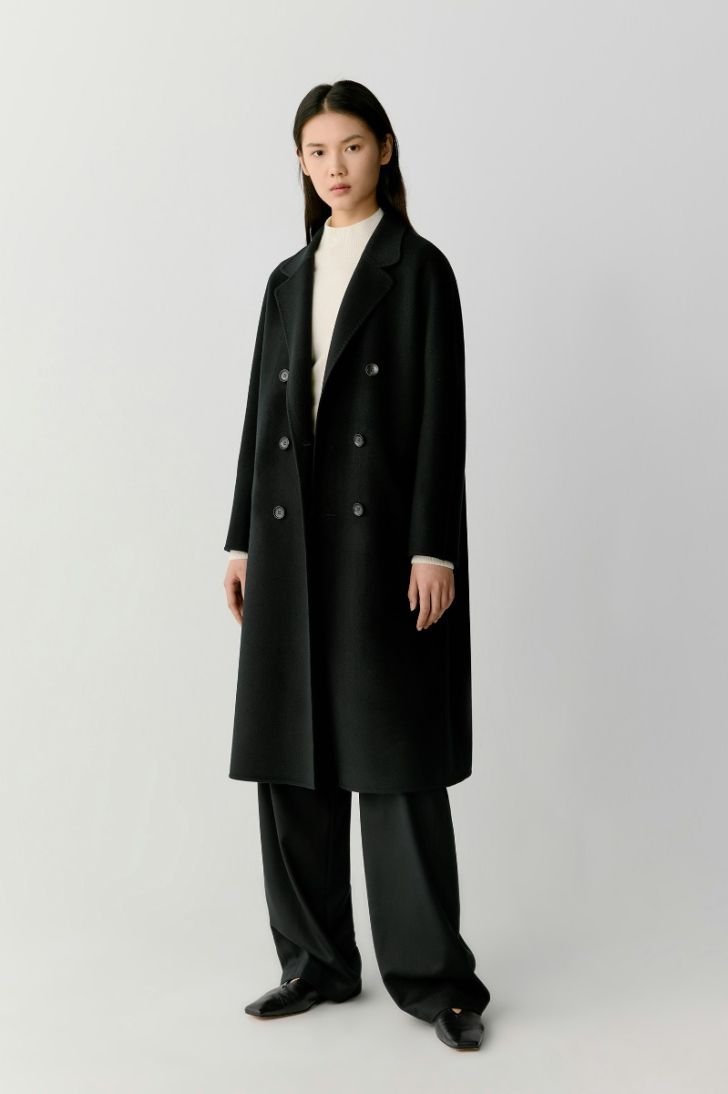
6. Cape coat

Source: Etsy
Elegantly draping, cape coats fasten at the neck, offering full coverage. Light or heavy, regal designs infuse sophistication into any outfit, seamlessly blending into both formal and casual occasions.
7. Raincoat

Source: Pipe & Row
Stay stylishly dry in a raincoat, designed with a large hood and water-resistant materials. Raincoats, available for adults, children, and even pets, are essential for wet weather.
8. Shearling coat

Source: Elle
Luxuriate in warmth with the shearling coat, made from soft lambskin or sheepskin. Whether cropped or full-length, it provides cozy comfort and stylish flair, perfect for those chilly days when you want both function and fashion.
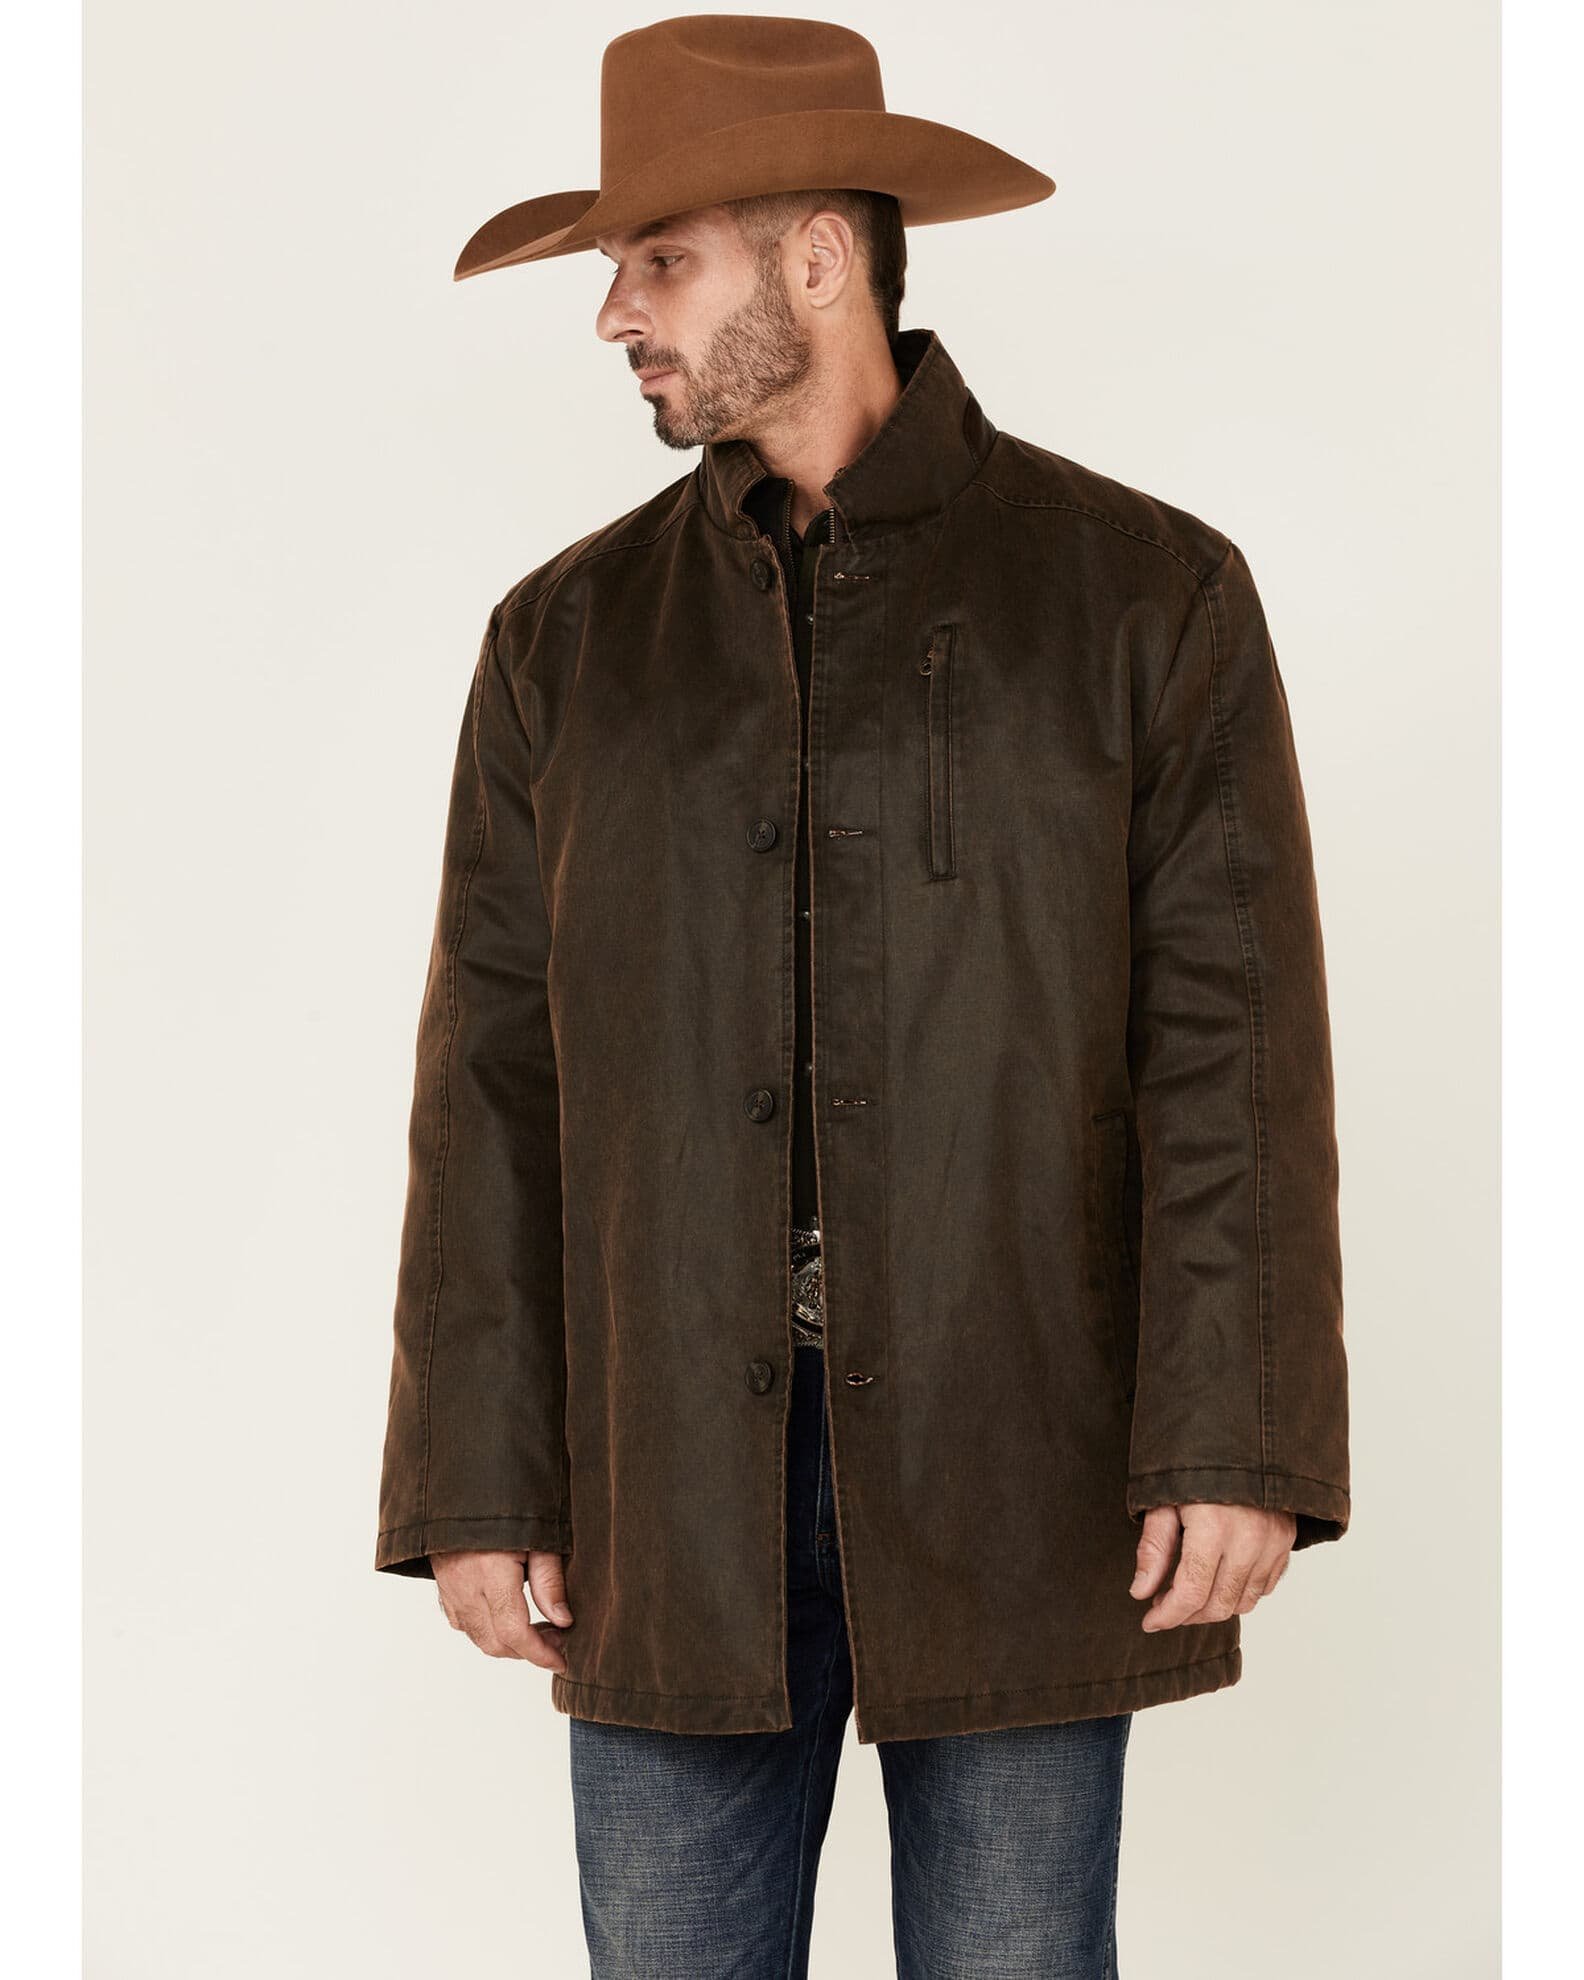
9. Duffle coat

Source: Peter Christian
Duffle coats, with thick wool and wooden toggles, present a distinctive look. Named after Duffel, Belgium, they blend durability with warmth, offering a charming, practical choice for winter.
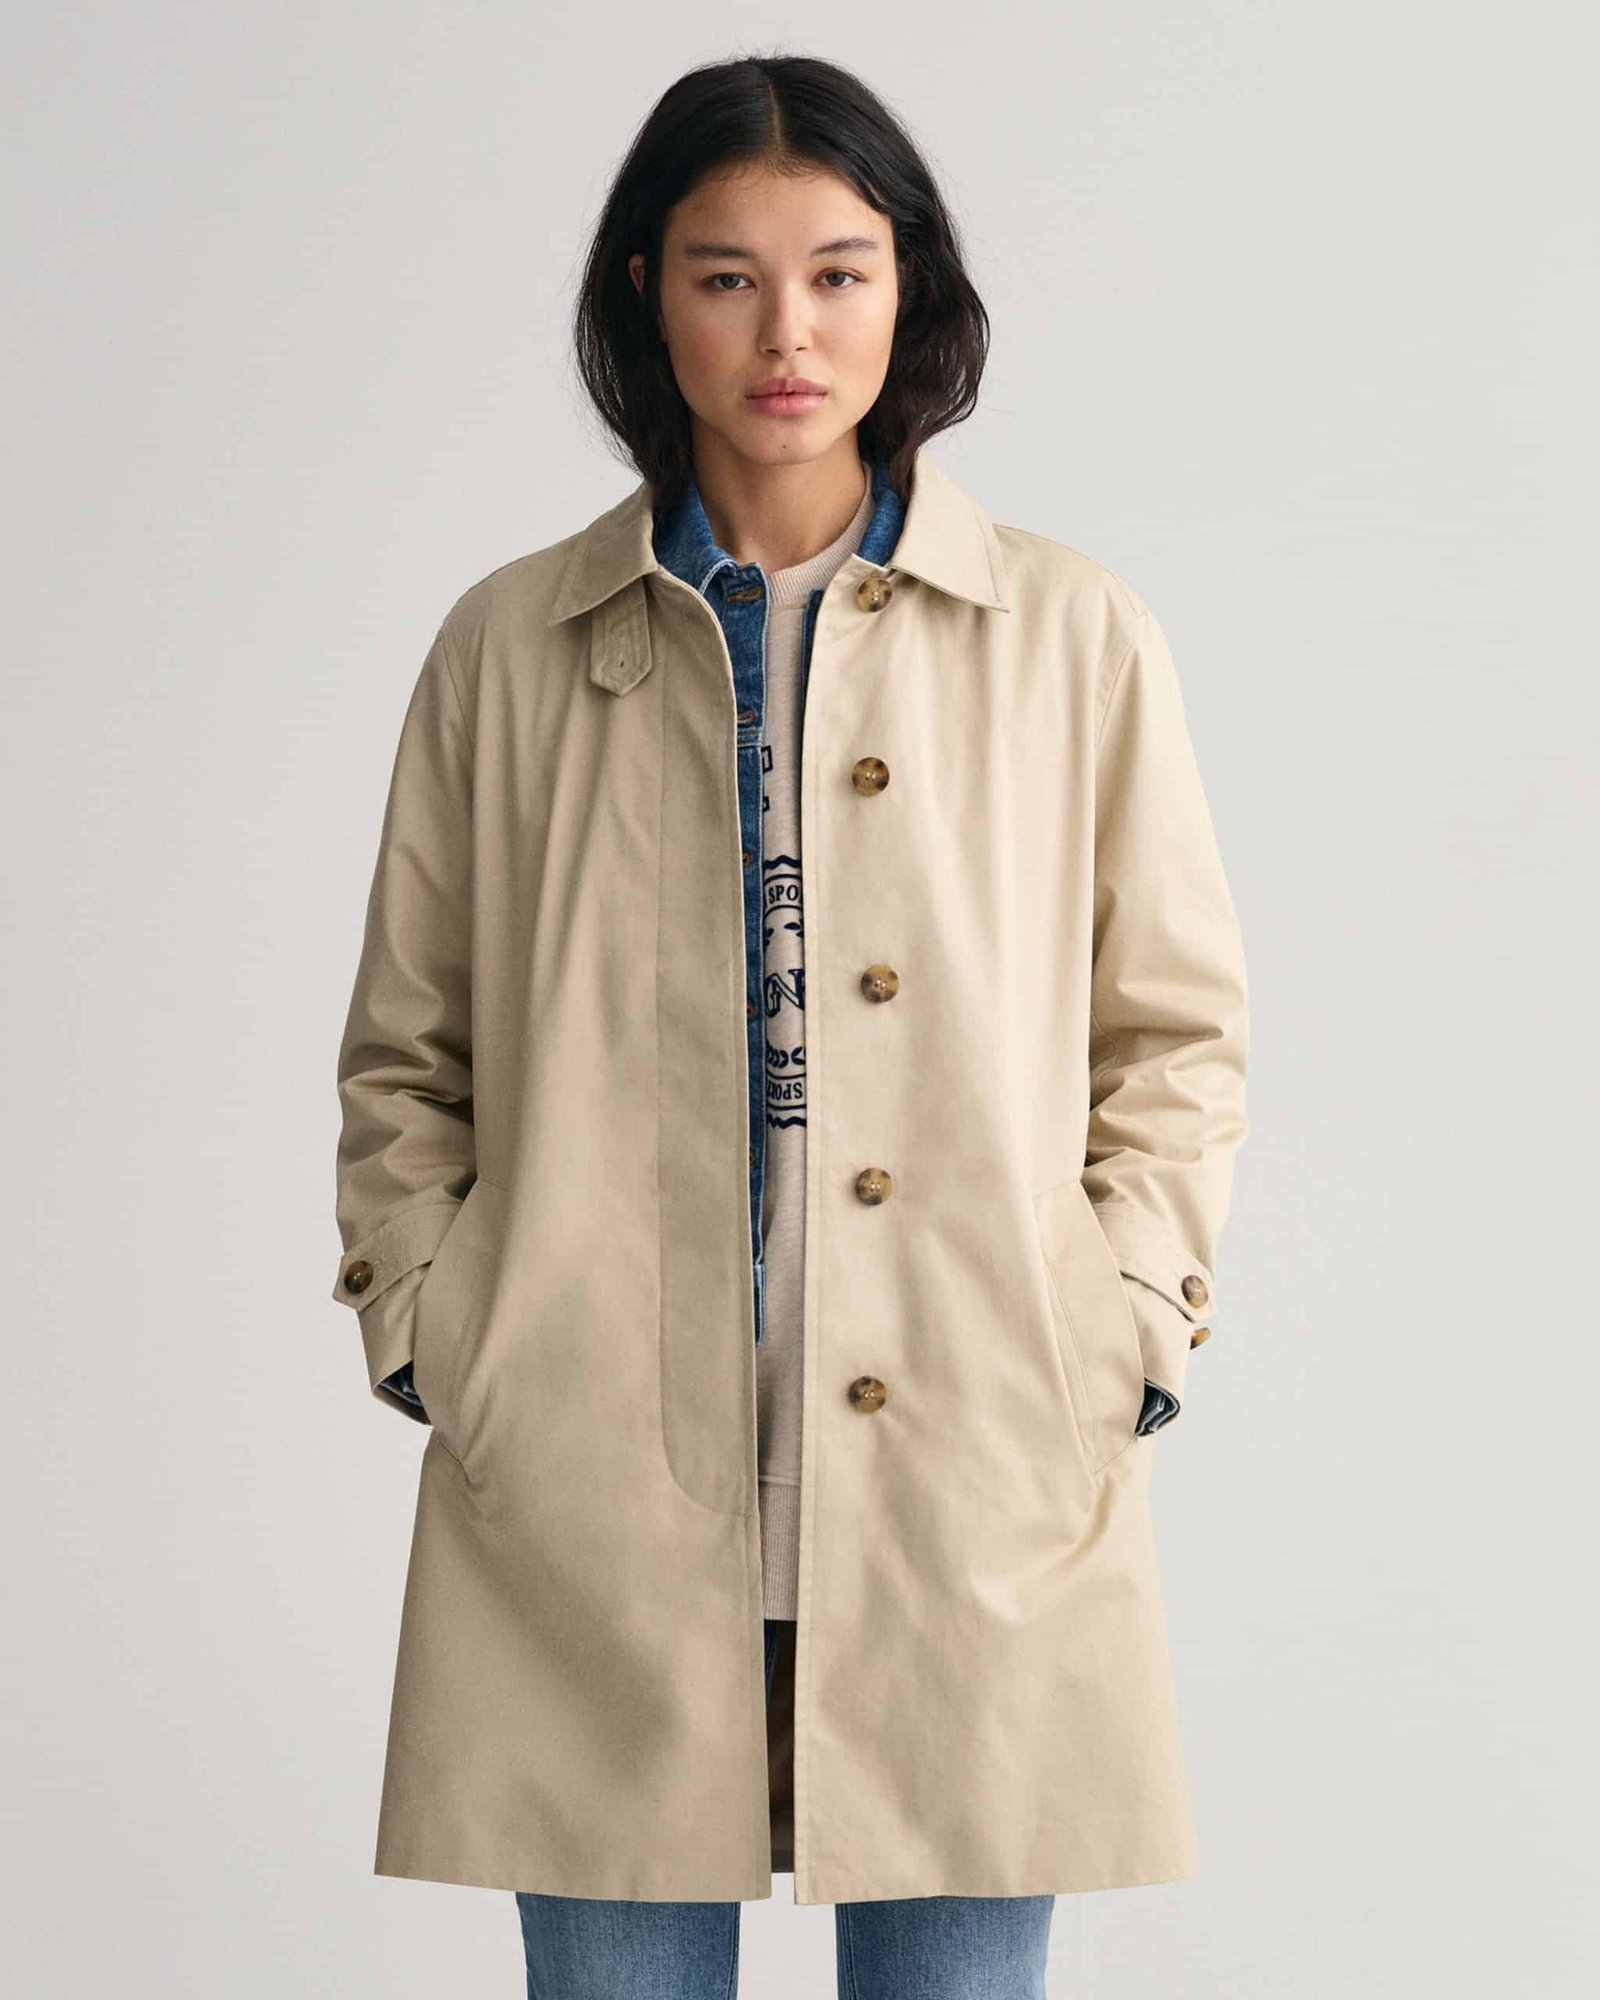
10. Car coat
Source: GANT
Designed for comfort in vehicles, the car coat is a short, snug option that keeps you warm without excess bulk. Originally for open-top cars, it’s practical for winter travel, blending functionality with classic style.
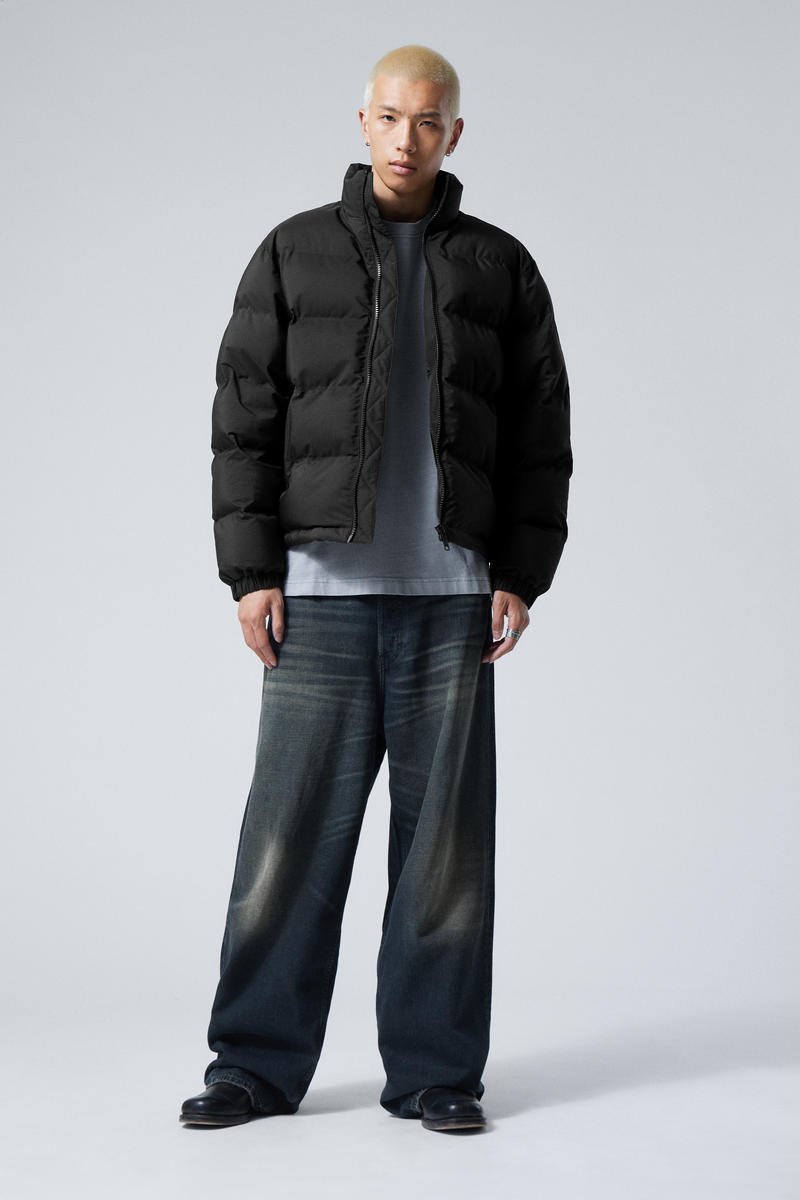
11. Puffer jacket
Source: WEEKDAY
Despite being called a jacket, the puffer coat excels in cold environments with its heat-trapping puffs. Ideal for both urban and outdoor settings, it’s often insulated with down.
With so many choices, there’s a perfect coat for every occasion and style. Explore the diverse world of coat manufacturing to find the one that suits your needs!
Anatomy of garment
Knowing the anatomy of a coat helps in understanding how different elements contribute to its overall design. Let’s explore the key components that make up this essential outerwear.
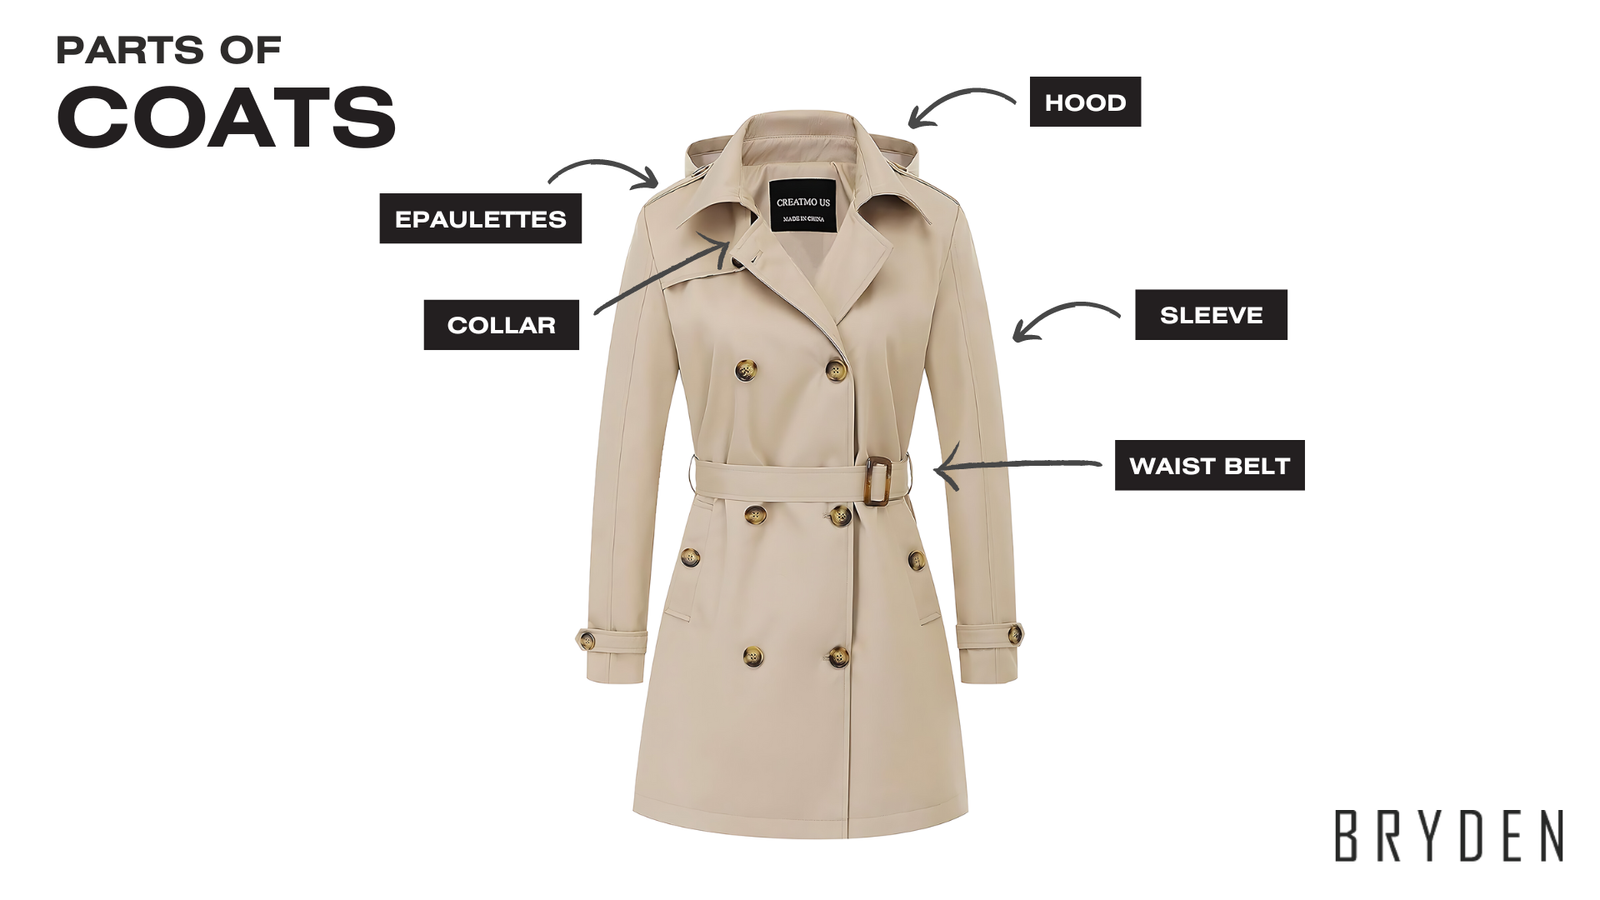
What are the parts of coats?
As styles vary, so does the anatomy of coats. Here’s a breakdown of the most common coat parts to give you a clearer picture.
1. Coat front and coat back
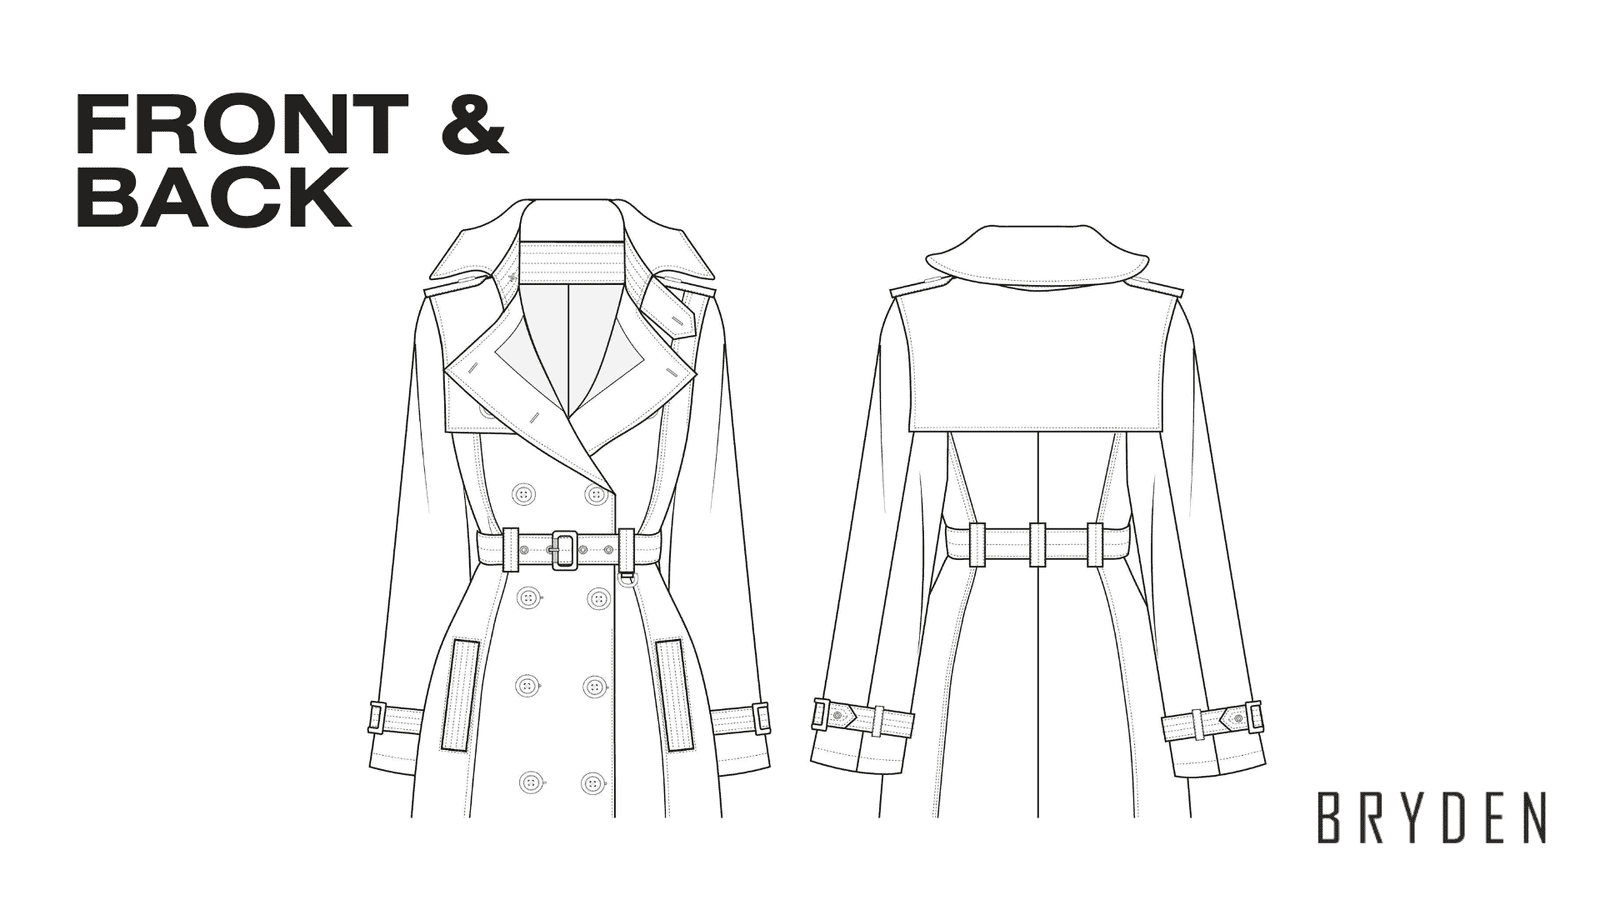
The coat front, usually in two parts, covers your chest and is secured with zippers or buttons. For capes, it’s often a continuous panel. The back, which might be a single piece or stitched together, wraps around your rear for complete coverage.
2. Collar
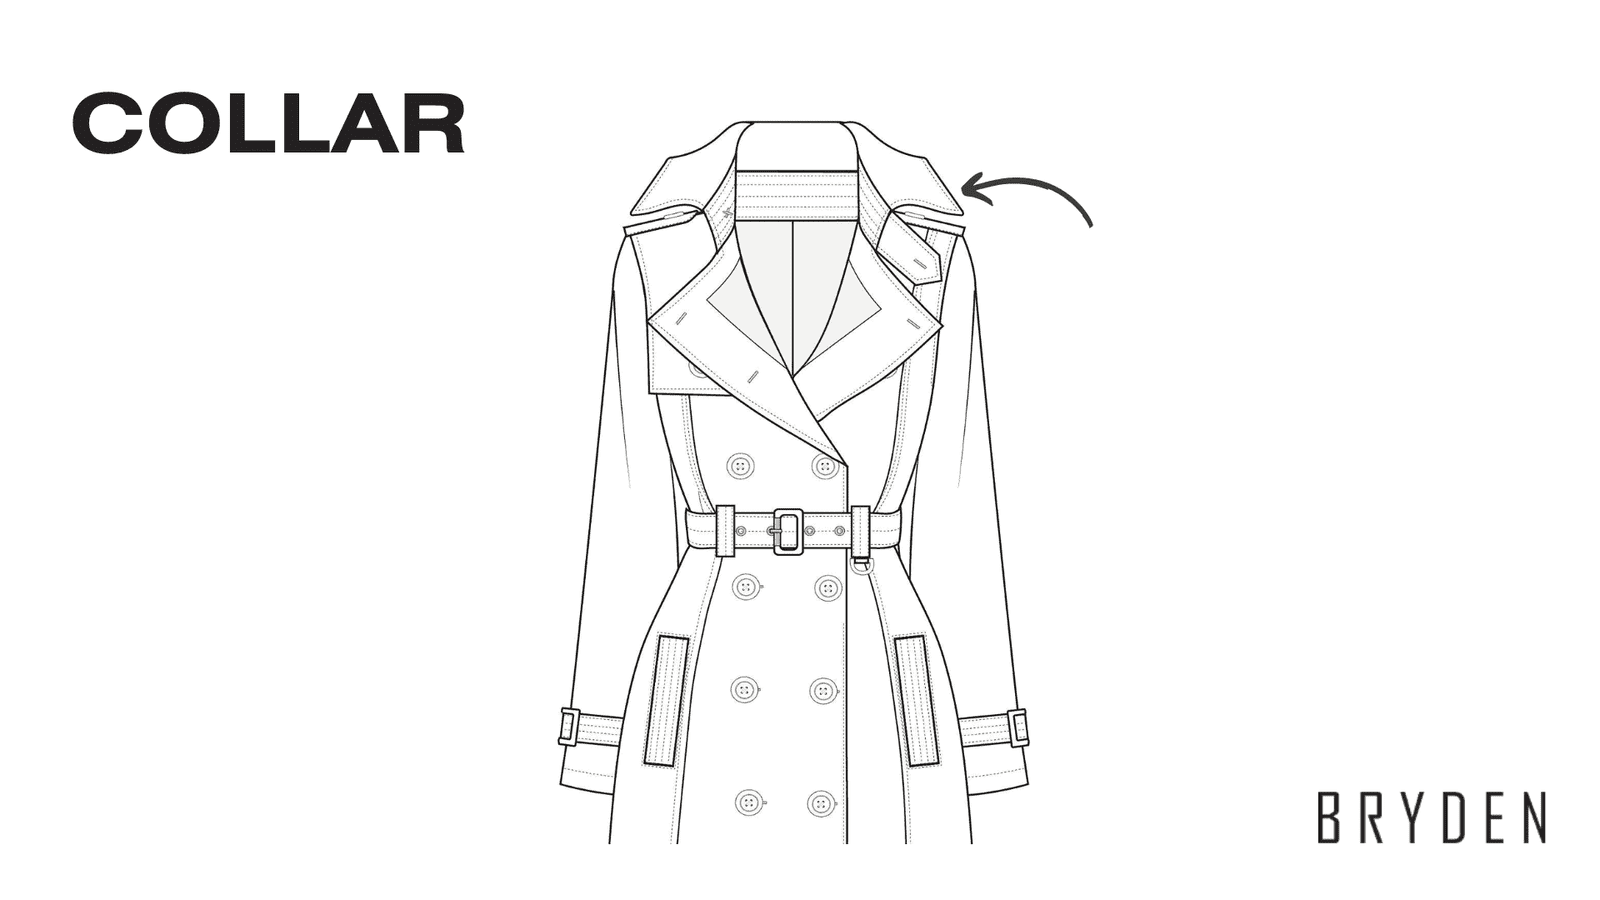
Framing the neck, the collar adds style and warmth. In harsh weather, it may wrap snugly around the neck and chin, while decorative collars offer flair without extra protection. Fasteners vary—zippers, buttons, or snaps secure the coat in place.
3. Sleeve

Sleeves reach the wrist, ranging from cropped to full-length. Styles vary from cuffed and raglan to kimono and bell, adding a personal touch to your coat.
4. Pockets
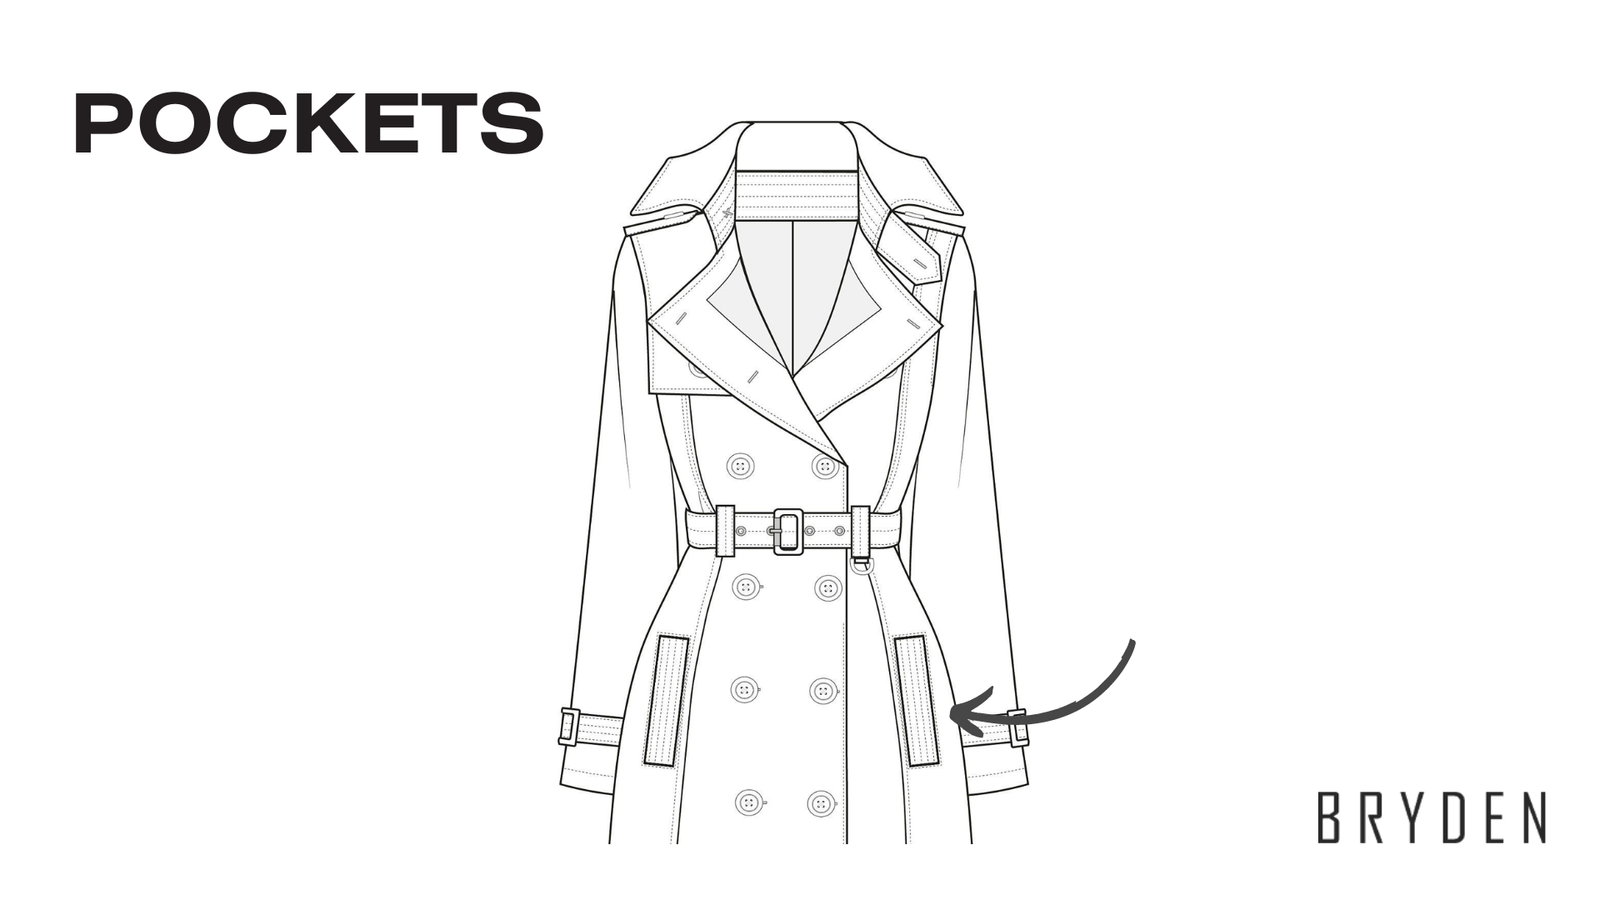
Pockets come in various forms, from simple side slits to detailed flaps. Essential for functionality, their depth ensures your essentials stay secure.
5. Belt
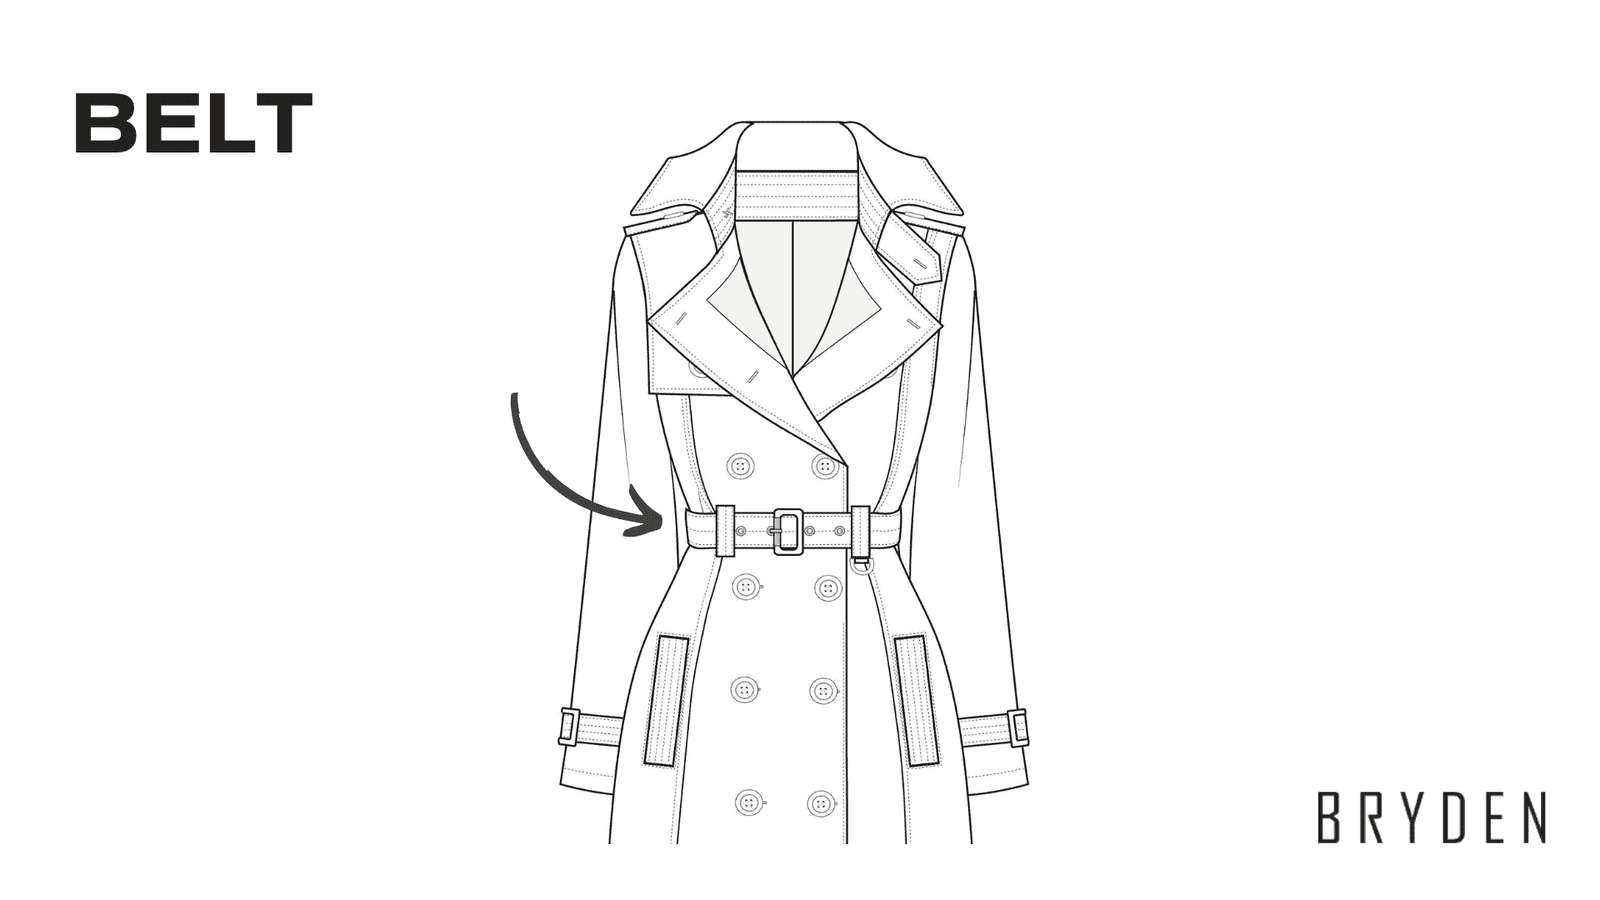
Found in trench coats and raincoats, belts help keep the coat securely fastened. Some coats have belts purely for decoration. Belt loops, typically placed at the waist, hold the belt securely in place.
6. Lining
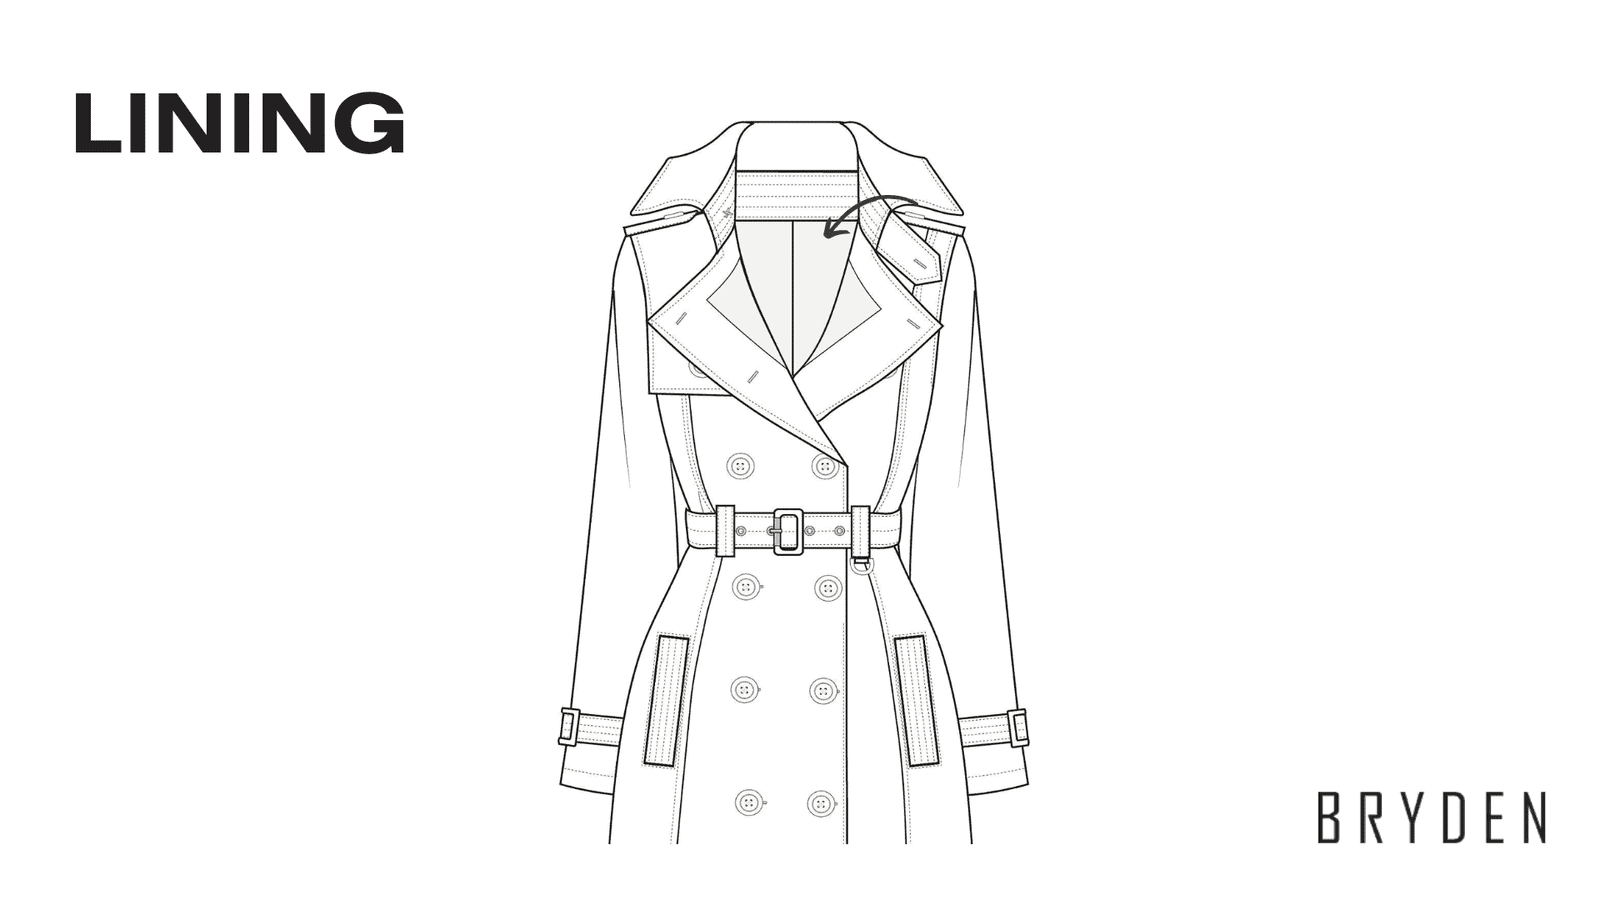
Lining, made from satin, silk, or polyester, adds both comfort and warmth. Some coats feature additional fur linings for extra coziness and style.
7. Hood
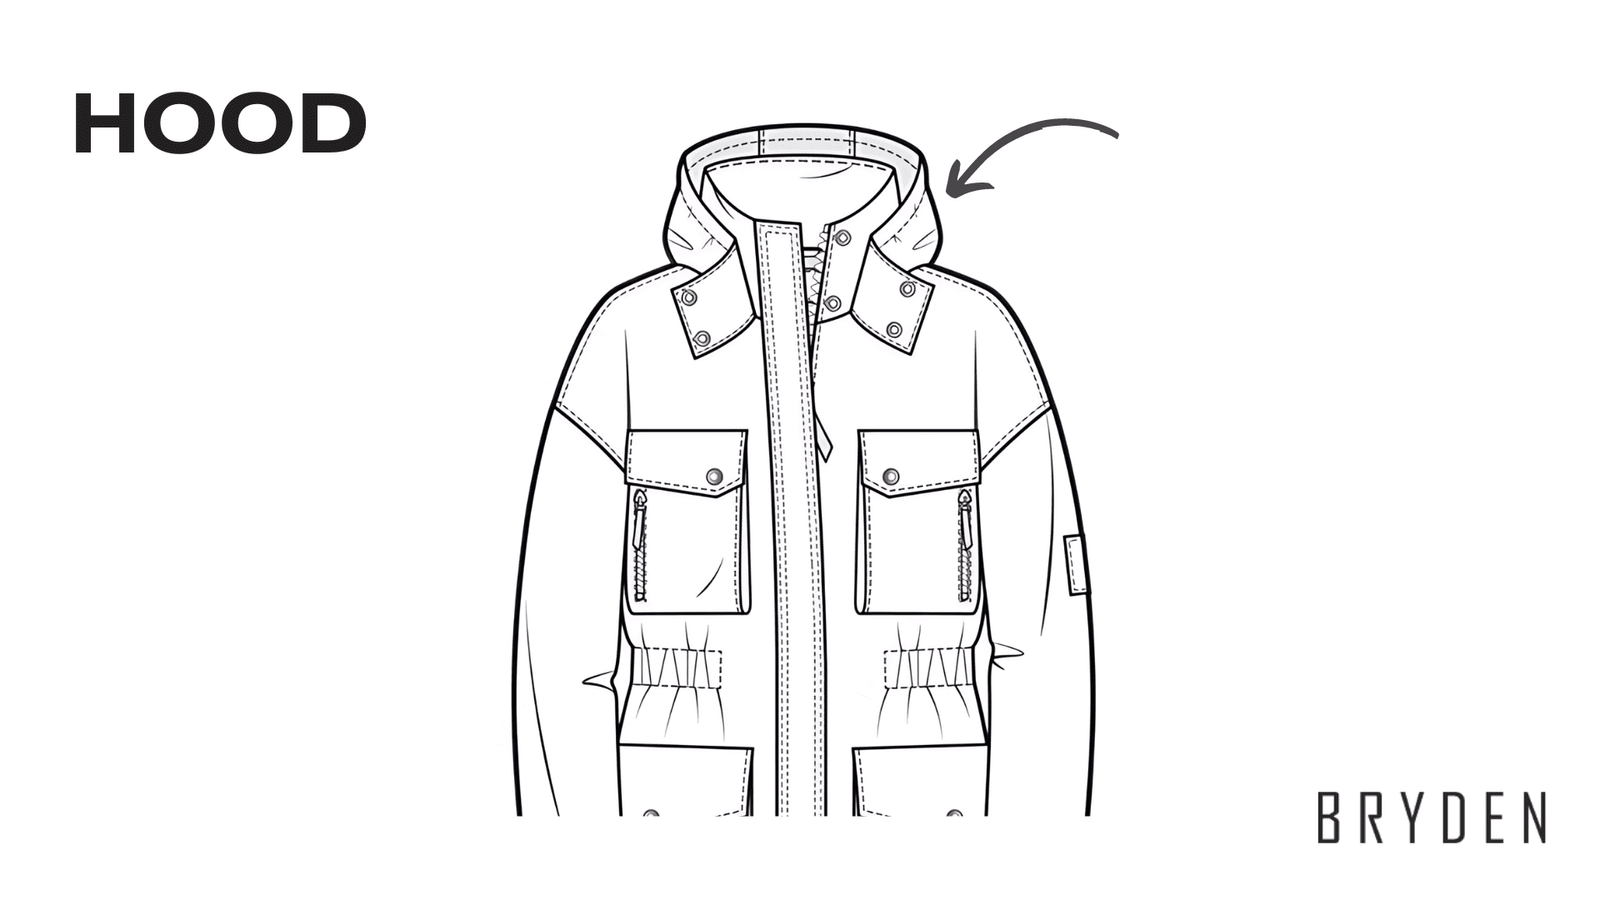
Hoods offer extra protection and can be detachable or fixed. Common in puffers and quilted coats, they ensure warmth and dryness.
8. Epaulettes

Epaulettes, frequently found on trench coats, began as shoulder straps signifying rank. Now, they add a stylish touch or serve practical purposes, like securing accessories.
9. Vent
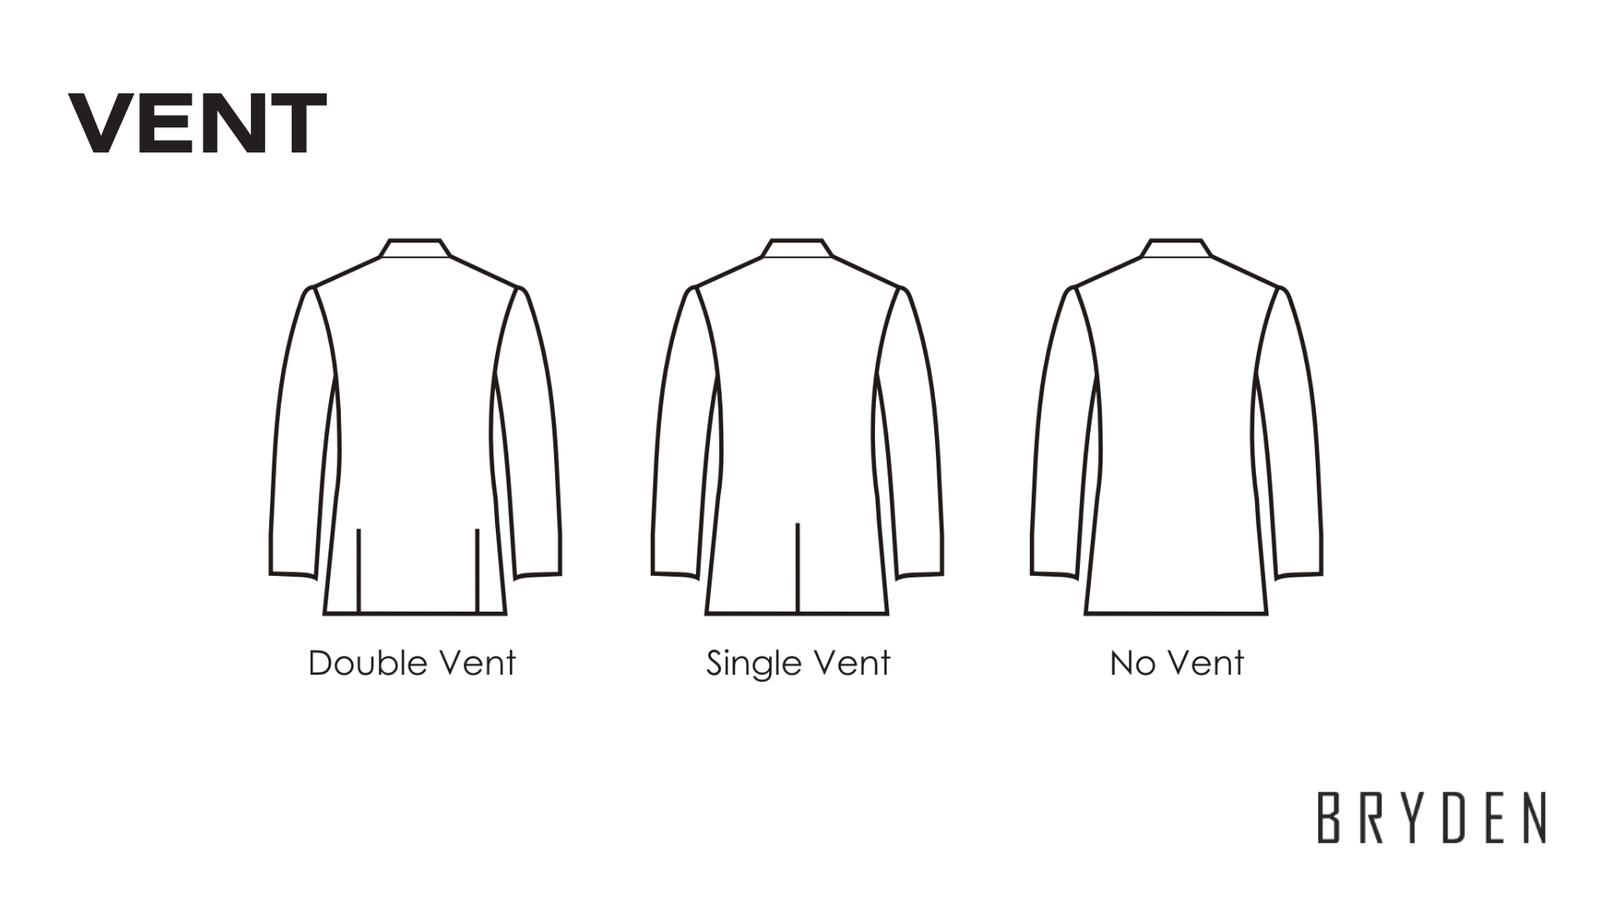
Vents, typically at the back, provide ease of movement and reduce constriction. Their length varies, adding both function and style.
10. Lapels
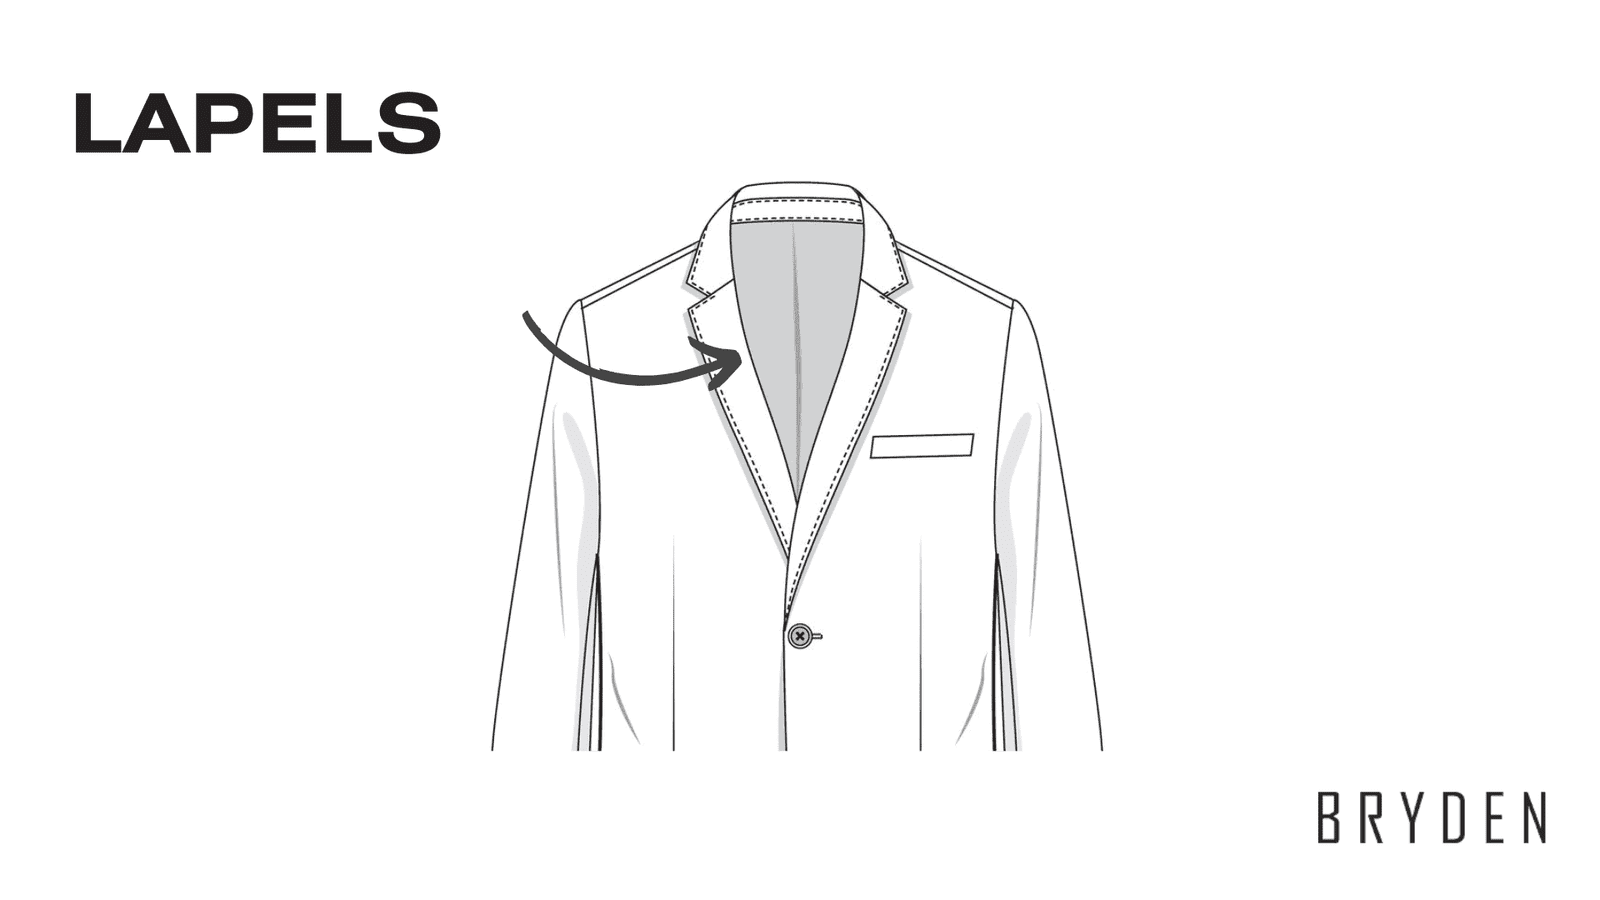
Lapels are the folded fabric flaps on the front, adding a touch of class to formal coats. They can be styled in various ways to enhance the coat’s elegance.
A coat’s element contributes to its unique blend of style and functionality, showcasing the artistry of coat design.
Choosing quality fabrics

1. Wool
Ah, the classic choice! Wool combines natural insulation with breathability, perfect for medium-weight coats. It wicks moisture and dries swiftly, making it a favorite for traditional styles. Wool blends with synthetics can enhance its modern appeal.
2. Fleece
Wrap yourself in fleece—soft like cotton, warm like wool. Quick-drying, and easy to care for, fleece makes an ideal lining that offers warmth without adding bulk.
3. Gabardine
Gabardine combines wool and cotton into a fabric that’s both elegant and durable. Smooth and machine-washable, gabardine is ideal for trench coats and overcoats, merging luxury with practicality.
4. Nylon
For a tough and water-resistant shell, nylon is a top pick. Lightweight and stretchy, it handles the demands of outerwear while trapping warmth and being easy to clean.
5. Polyester
Polyester shines as a versatile, durable fabric. Lightweight, water-resistant, and low-maintenance, it mimics various textures while resisting shrinking and wrinkling—ideal for keeping coats looking sharp.
6. Tweed
Classic and robust, tweed is a blend of wool and silk with its distinct texture and moisture resistance. Great for trench coats and casual wear, it’s less suited for formal settings but stands out in professional attire.
7. Fur and faux fur
Warmth meets luxury with fur—whether real or faux. Real fur brings unmatched insulation and elegance, but faux fur offers a cruelty-free, easier-to-care-for alternative that’s rapidly gaining popularity.
8. Canvas
Canvas, tough and water-resistant, comes from tightly woven cotton or synthetics. Durable yet breathable, canvas suits casual and workwear coats, standing up to heavy use with ease.
With a myriad of fabrics at your fingertips, these standout choices offer unique benefits, helping you find the ideal material for any coat style.
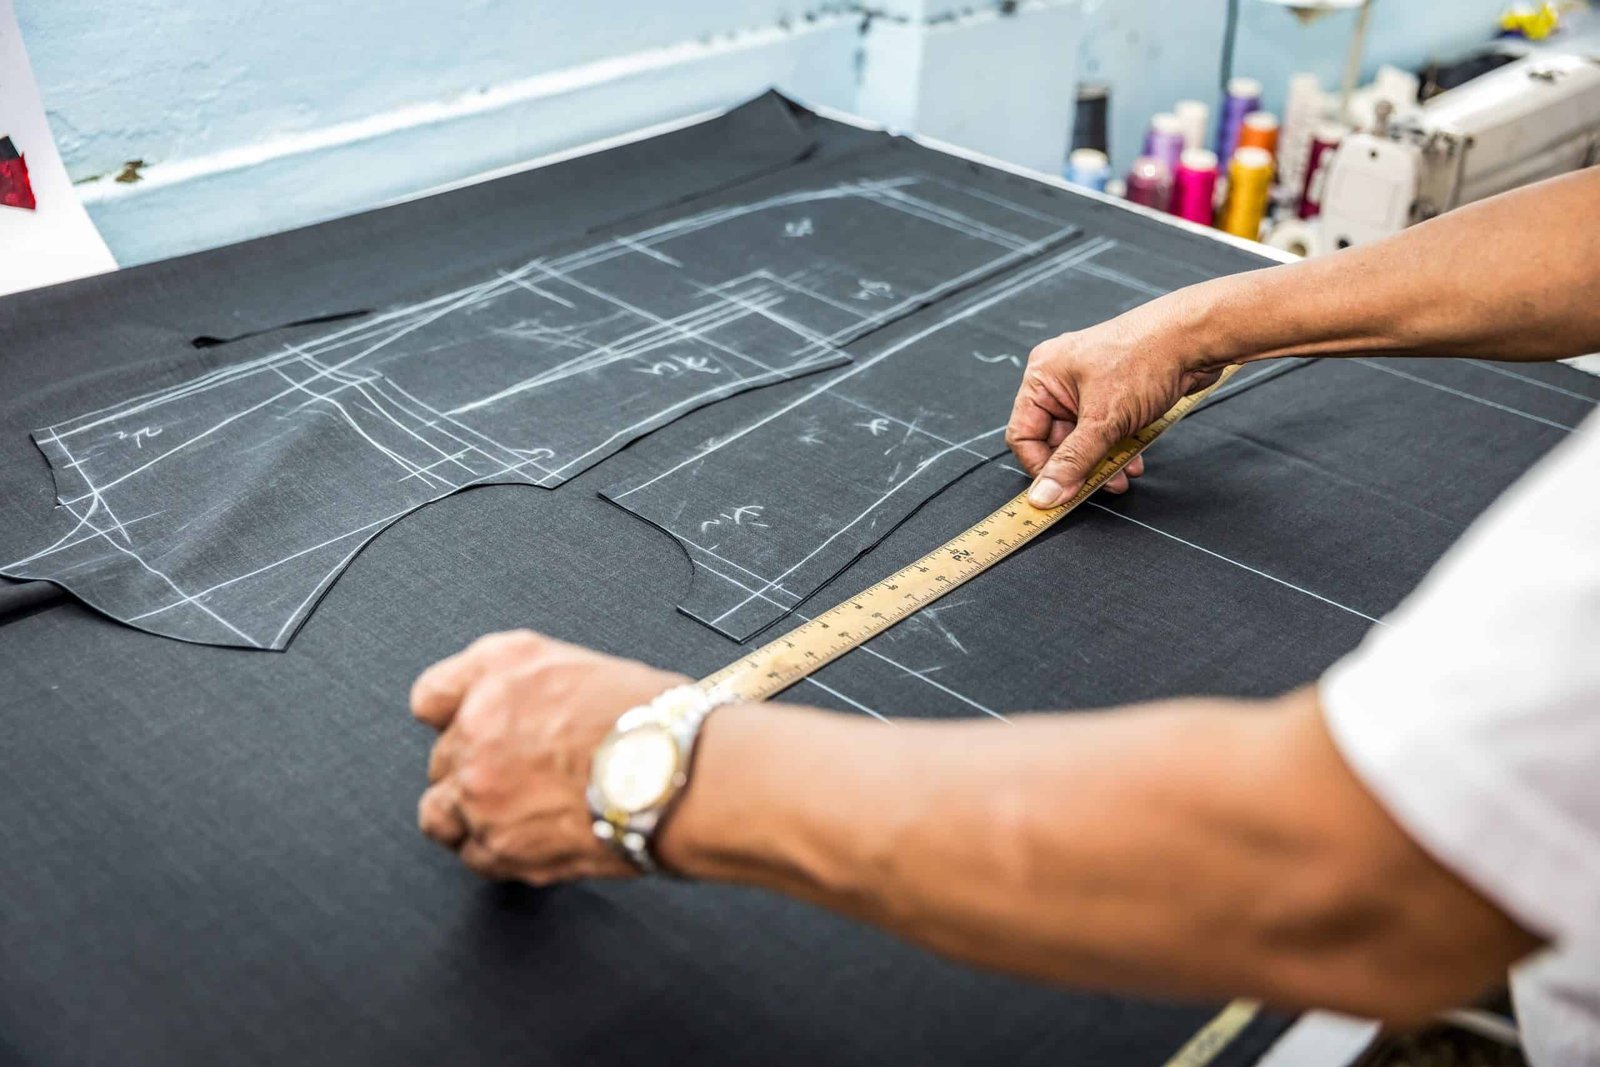
Pattern making and cutting
Pattern making and cutting are pivotal stages in coat production, blending traditional skills with modern technology. This process sets the foundation for creating a coat that fits perfectly and looks impeccable.
Manual pattern making
Crafting patterns by hand involves using tools like rulers, measuring tapes, and pattern paper. This method starts with drafting the pattern based on measurements and design specifications, requiring a deep understanding of garment construction. Adjustments are made directly on the paper, allowing precise control but requiring patience.
Digital pattern making
Specialized software helps create and modify patterns on a computer. This approach offers quick adjustments, 3D visualizations, and easier sharing and storage. It’s especially useful for complex designs, with virtual fittings ensuring a perfect fit before physical production.
Cutting
Once the pattern is ready, it’s time to cut. This step involves carefully following the pattern shapes to ensure all pieces align perfectly for assembly.
Pattern making (How to with samples)
Creating a coat involves transforming design concepts into precise templates through several key stages. This process includes considering fabric properties, drafting, and modifying basic patterns.
Here’s an overview of the essential steps leading up to the creation of individual pattern pieces.
1. Considerations for pattern making
Measurements, ease, and design elements all play critical roles, along with fabric considerations. The choice of fabric—whether it’s heavy wool or lightweight nylon—affects how the pattern is drafted. Seam allowances and grainlines must be carefully included to ensure proper construction.
2. Drafting and modifying patterns
The process starts with creating basic block patterns based on measurements and fabric characteristics. These blocks are then adjusted to match the desired style and fit, incorporating design elements such as pockets or pleats.
3. Creating pattern pieces
The modified blocks are broken down into individual pattern pieces, including the front, back, sleeves, collar, and facings. Each piece is carefully crafted to ensure it aligns perfectly with the overall design and provides a comfortable fit.
Now that we’ve covered the essential steps for creating individual pattern pieces for coats, let’s dive into some pattern samples. By examining these examples, we can better understand the process and techniques involved in making each piece.
1. Trench coat for men

A men’s trench coat features a broader shoulder line and a more relaxed fit through the torso compared to women’s designs, emphasizing practicality and military-inspired details.
This pattern includes a standing collar with a bridge and hook closure,and a double-breasted front that adds a classic touch. Slanted welt pockets and a box pleat with a back slit add functionality. The waist belt defines the silhouette, while epaulettes provide a military-inspired flair.
2. Raincoat
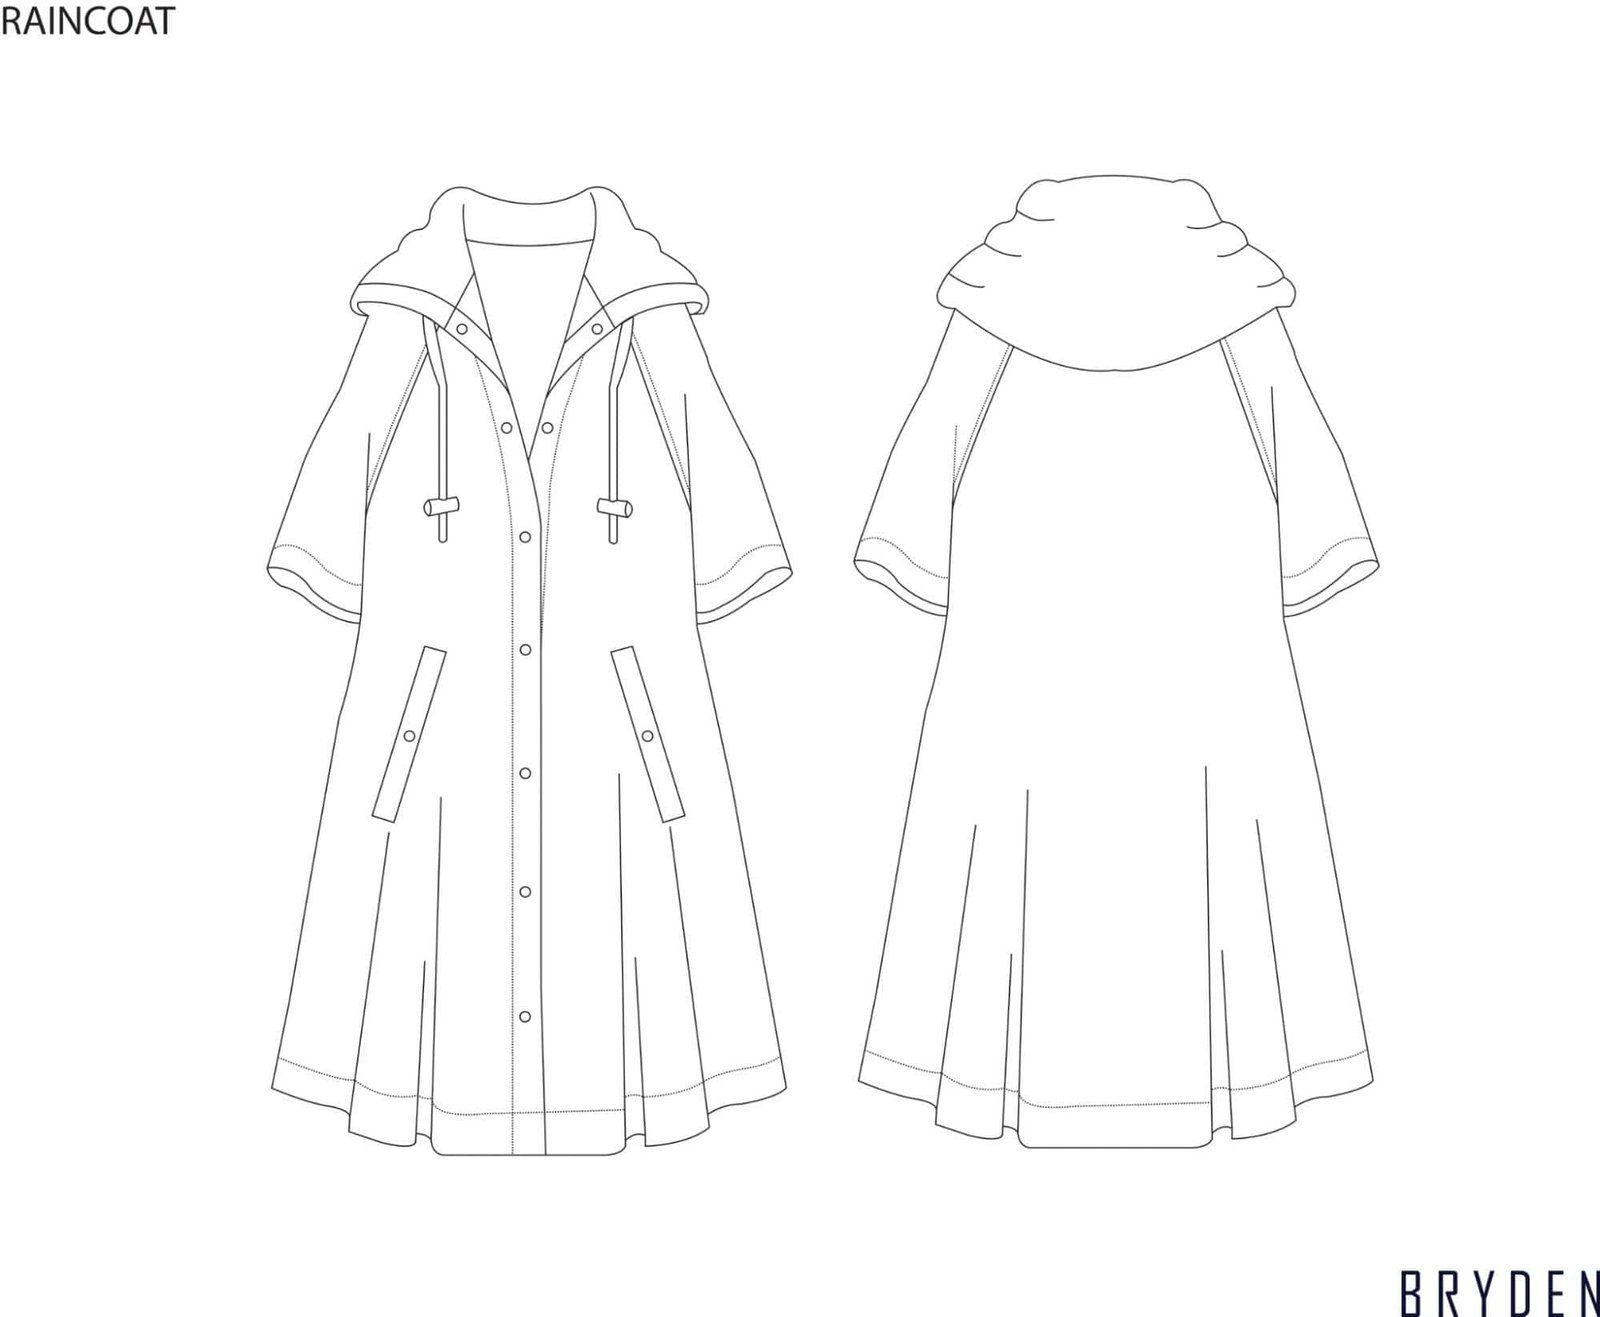
This raincoat pattern is designed with practical features for weather protection. The back of the coat is longer than the front, offering additional coverage. Long sleeves and slanted pockets enhance functionality.
Like common raincoat styles, it has button closures for a secure fit. The addition of a hood ensures protection from the elements. This pattern combines style with practicality, making it an excellent choice for rainy days.
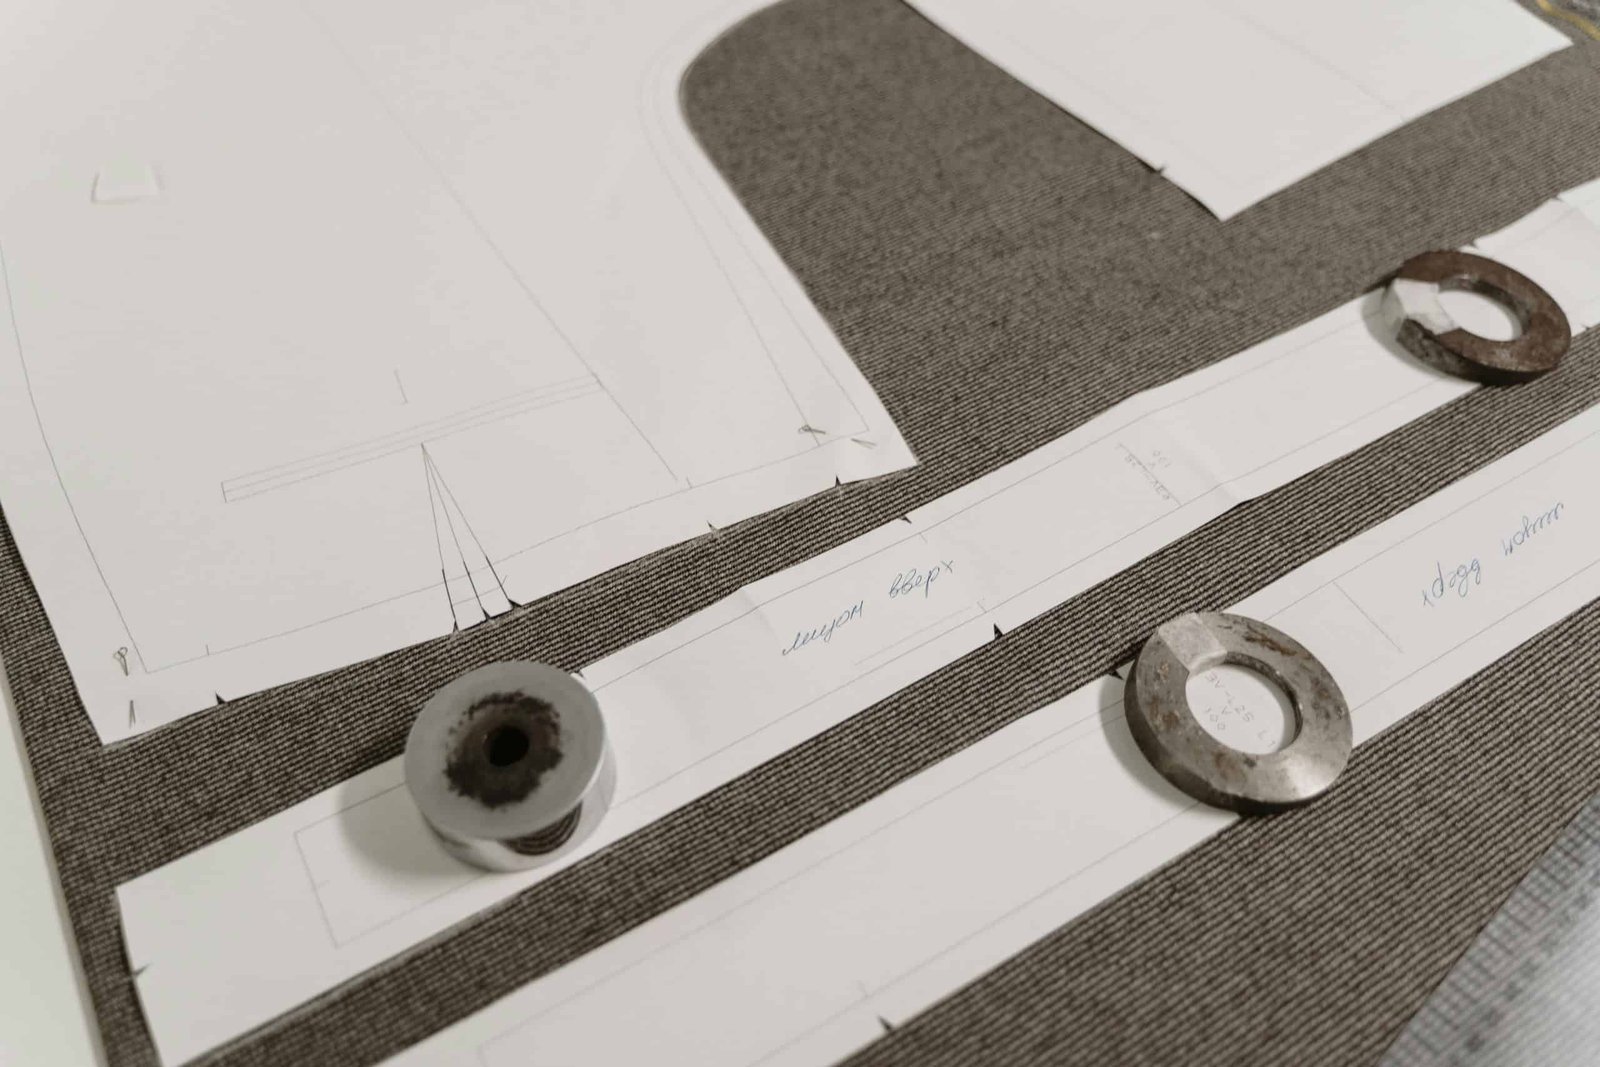
Marking tips for cutting patterns on fabric
Accurate marking of fabric is essential in coat manufacturing. Precision in marking ensures that every coat turns out well-fitting and professional. Here’s how it’s done:
1. Choosing the right marking tool
Tools like tailor’s chalk, fabric markers, tracing paper, and wheels are essential. Each serves a specific purpose based on the fabric. For best results, select the appropriate tool for the fabric type.
2. Consider fabric type
For delicate materials like wool, softer tools such as chalk are used to prevent damage. On the other hand, heavier fabrics, like tweed or canvas, require more robust marking methods, such as fabric markers or tailor’s tacks.
3. Mark key points accurately
Grainlines are marked to ensure alignment with the fabric’s grain, avoiding distortion. Notches are indicated to guide seam alignment, while darts, pleats, and tucks are marked for shaping and fit.
4. Handle fabric carefully
Excessive handling is avoided to keep markings intact and prevent fabric stretching.
5. Double-check before cutting
Before cutting, all markings are double-checked against the pattern to prevent errors in the final garment.
These steps ensure that each coat is cut precisely, leading to a well-fitting and polished end product.
Cutting and sewing in coats manufacturing
Cutting and sewing are the heartbeats of coat manufacturing, defining the garment’s quality and fit. Once the patterns are set, the cutting begins—fabric is meticulously sliced along the lines. This precision ensures each piece is just right. Sewing then takes over, where skill and focus bring the coat to life, piecing together the fabric with care.
Seam construction
Different stitch types are used for various parts of the coat. Seam allowances are crucial for fitting and reinforcing areas prone to stress, ensuring the coat’s durability.
Order of assembly
Assembly starts with the main parts of the coat, including the lining, coat front, and back. This establishes the basic structure. Next, collars, lapels, and other details are added. Following the main assembly, the coat undergoes pressing and finishing. This process ensures that all seams are smooth, and the coat has a polished appearance.
Overall, each step in cutting and sewing is carefully executed to create a well-fitting and high-quality coat.
How to cut the coat
The journey to a perfectly tailored coat continues with the meticulous alignment of fabric and pattern pieces. This crucial phase shapes the garment’s quality and fit, ensuring each piece comes together seamlessly to create a precise and well-fitted coat.
Fabric preparation
Before cutting begins, the fabric needs to be prepared. Spreading the fabric evenly on the cutting table while smoothing out wrinkles is key. Ensuring the fabric lays flat and aligns with the pattern pieces during preparation is essential.
Pattern placement
Next, the pattern pieces are laid out on the fabric. Accurate placement is crucial to make the most of the fabric and to ensure that each piece matches the pattern precisely. This step helps in avoiding waste and ensures all sections are correctly aligned for sewing.
Cutting techniques:
For smaller batches or high-end coats, skilled workers cut patterns by hand using scissors or rotary cutters. This method allows for detailed precision but demands experienced hands.
In large-scale operations, automated cutting machines can cut through multiple layers of fabric at once. These machines enhance efficiency and accuracy, ensuring consistent cuts across large production runs.
Marking
Markings on the fabric guide the sewing process. They help in aligning seams, notches, and other details correctly. Clear, precise markings are essential for ensuring that the final assembly matches the design.
Different types of seams for coats
Seams play a crucial role in coat manufacturing, ensuring the garment’s durability and enhancing its appearance and functionality. Let’s explore the different seam types and their unique contributions:
1. Plain seam
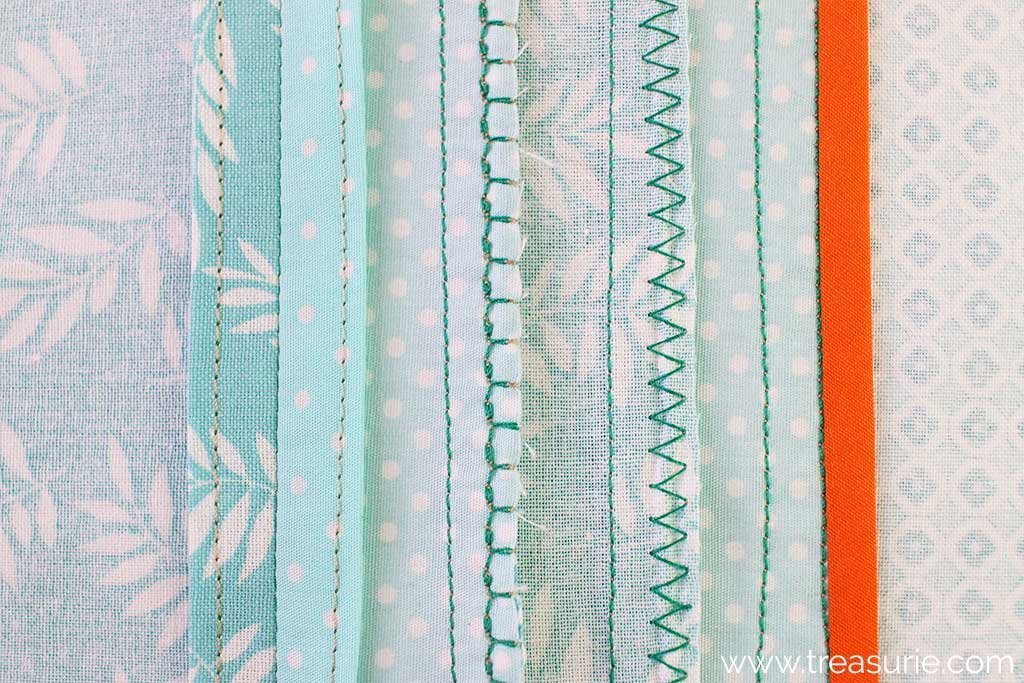
Source: Treasurie
This straightforward seam involves stitching two fabric pieces together with their right sides facing. Simple yet versatile, it’s a go-to for most coat parts, providing a clean and effective join.
2. Bias bound seam

Source: Things for Boys
By enclosing raw fabric edges with a binding, this seam creates a polished and professional finish. Often used decoratively or to prevent fraying, it adds a touch of refinement.
3. Hong Kong seam

Source: Closet Core Patterns
This bound seam uses bias tape to encase raw edges, giving a neat and sophisticated look. Ideal for unlined coats, it keeps the inside tidy while leaving the bias tape’s edge visible.
4. Flat-felled seam
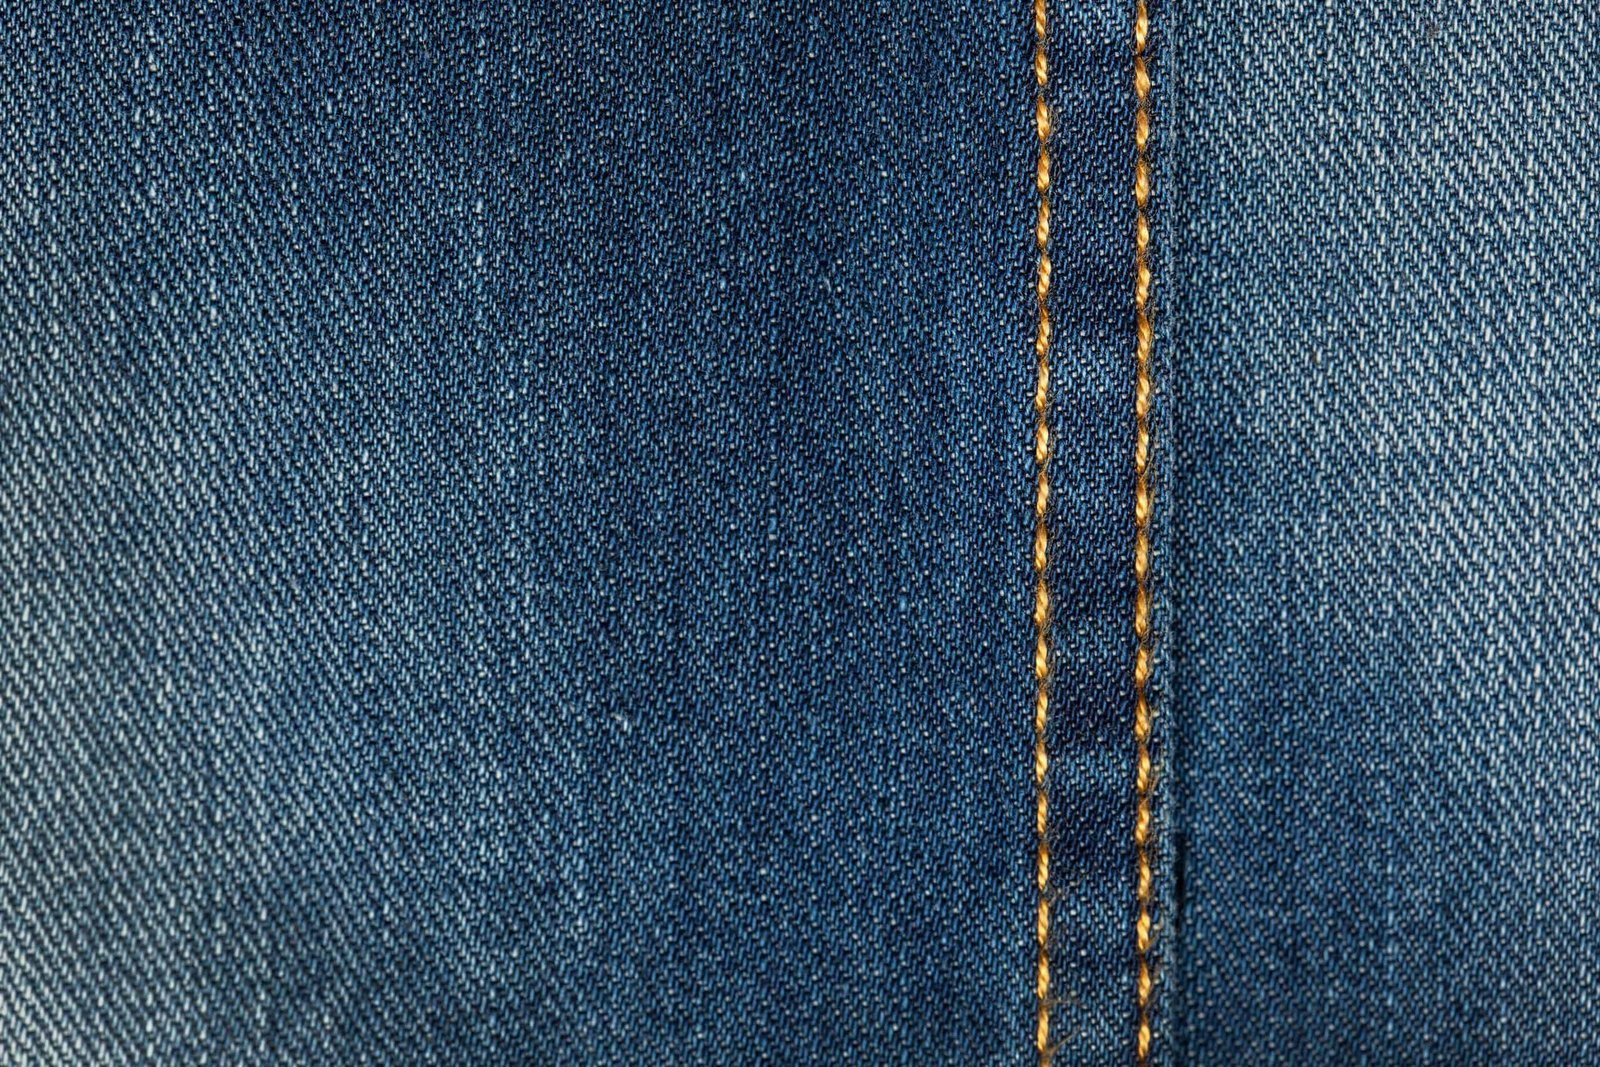
Source: Sew Daily
Known for its strength, this seam folds raw edges under and stitches them flat. Common in denim jackets, it’s also used in coats for added durability and a clean finish.
5. Lapped seam

Source: The Creative Curator
Here, one fabric piece overlaps another before being stitched down. This seam is perfect for decorative topstitching, adding a unique design element to the coat.
6. French seam
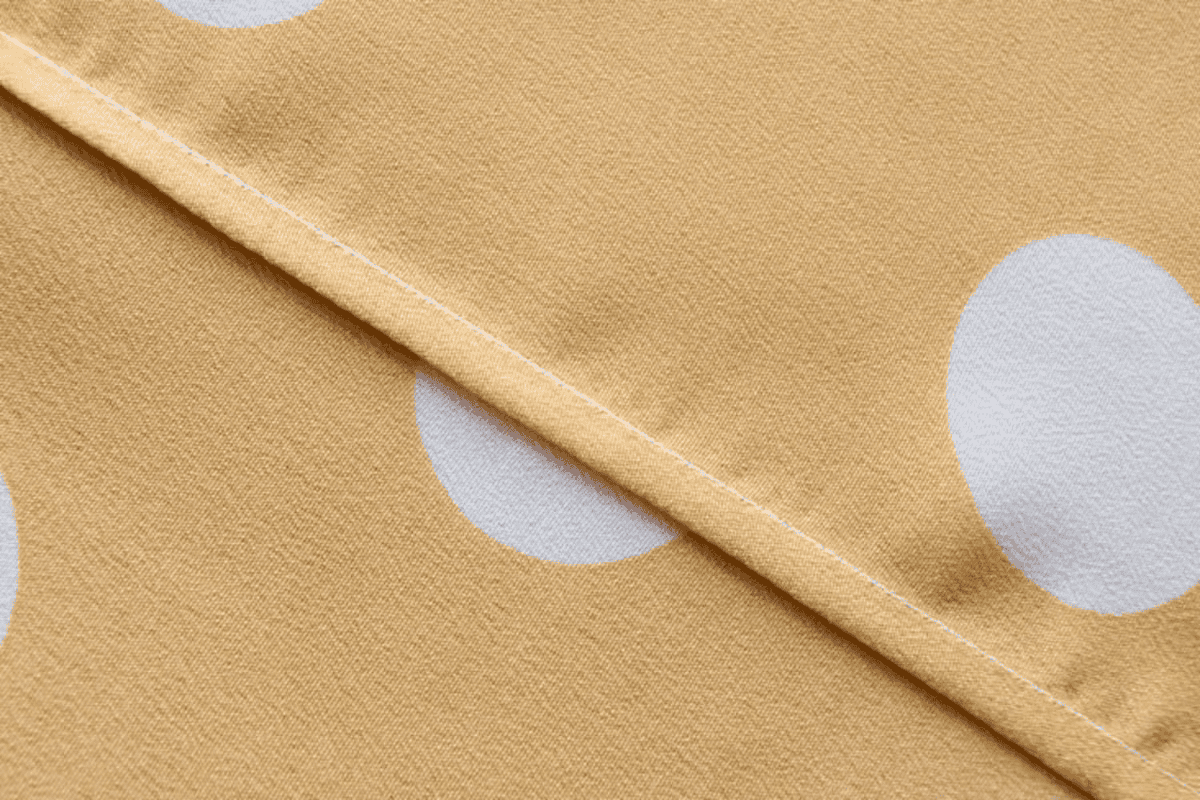
Source: Dutch Label Shop
Enclosing raw edges within the seam itself, the French seam offers a neat and durable finish. It’s ideal for lightweight fabrics, giving the coat a clean, refined look on the inside.
Each seam type boosts your coat’s style and function—strengthening, decorating, and ensuring every detail is finely tuned for durability and flair.
Measurement points for coats

For a coat to look and feel perfect, precise measurements are key. Each point helps tailor the coat to fit seamlessly. Here’s a quick guide to essential measurement points:
1. Shoulders
Spanning from one shoulder tip to the other, this width defines how well the coat rests on the shoulders. Proper shoulder measurement impacts both comfort and style, ensuring a tailored look.
2. Arm length
Measure from shoulder to cuff to get the sleeves just right. This crucial step prevents sleeves from being too short or long, essential for both comfort and movement, especially in sport coats.
3. Armhole
From the shoulder tip down to the sleeve’s back—this measurement ensures a snug yet flexible fit. It’s key for balancing style and comfort.
4. Chest/Bust
Around the fullest part of the chest, this measurement dictates the coat’s overall size. A precise chest measurement guarantees a flattering fit and enhances the coat’s look.
5. Waist
Measure the narrowest part of the waistline. This step ensures the coat fits comfortably around the waist, maintaining its shape and adding to the flattering silhouette.
6. Hip
For a coat that fits well around the lower body, accurate hip width measurement is crucial. It helps the coat drape nicely and boosts both comfort and style.
7. Body length
From the base of the coat to the desired end point, this measurement decides between cropped or long styles. It ensures the coat falls just right, complementing the wearer’s height and fashion preferences.
Precise measurements transform fabric into a coat that fits flawlessly and looks stunning. Meticulous attention to detail ensures both comfort and elegance, resulting in a garment that truly stands out.
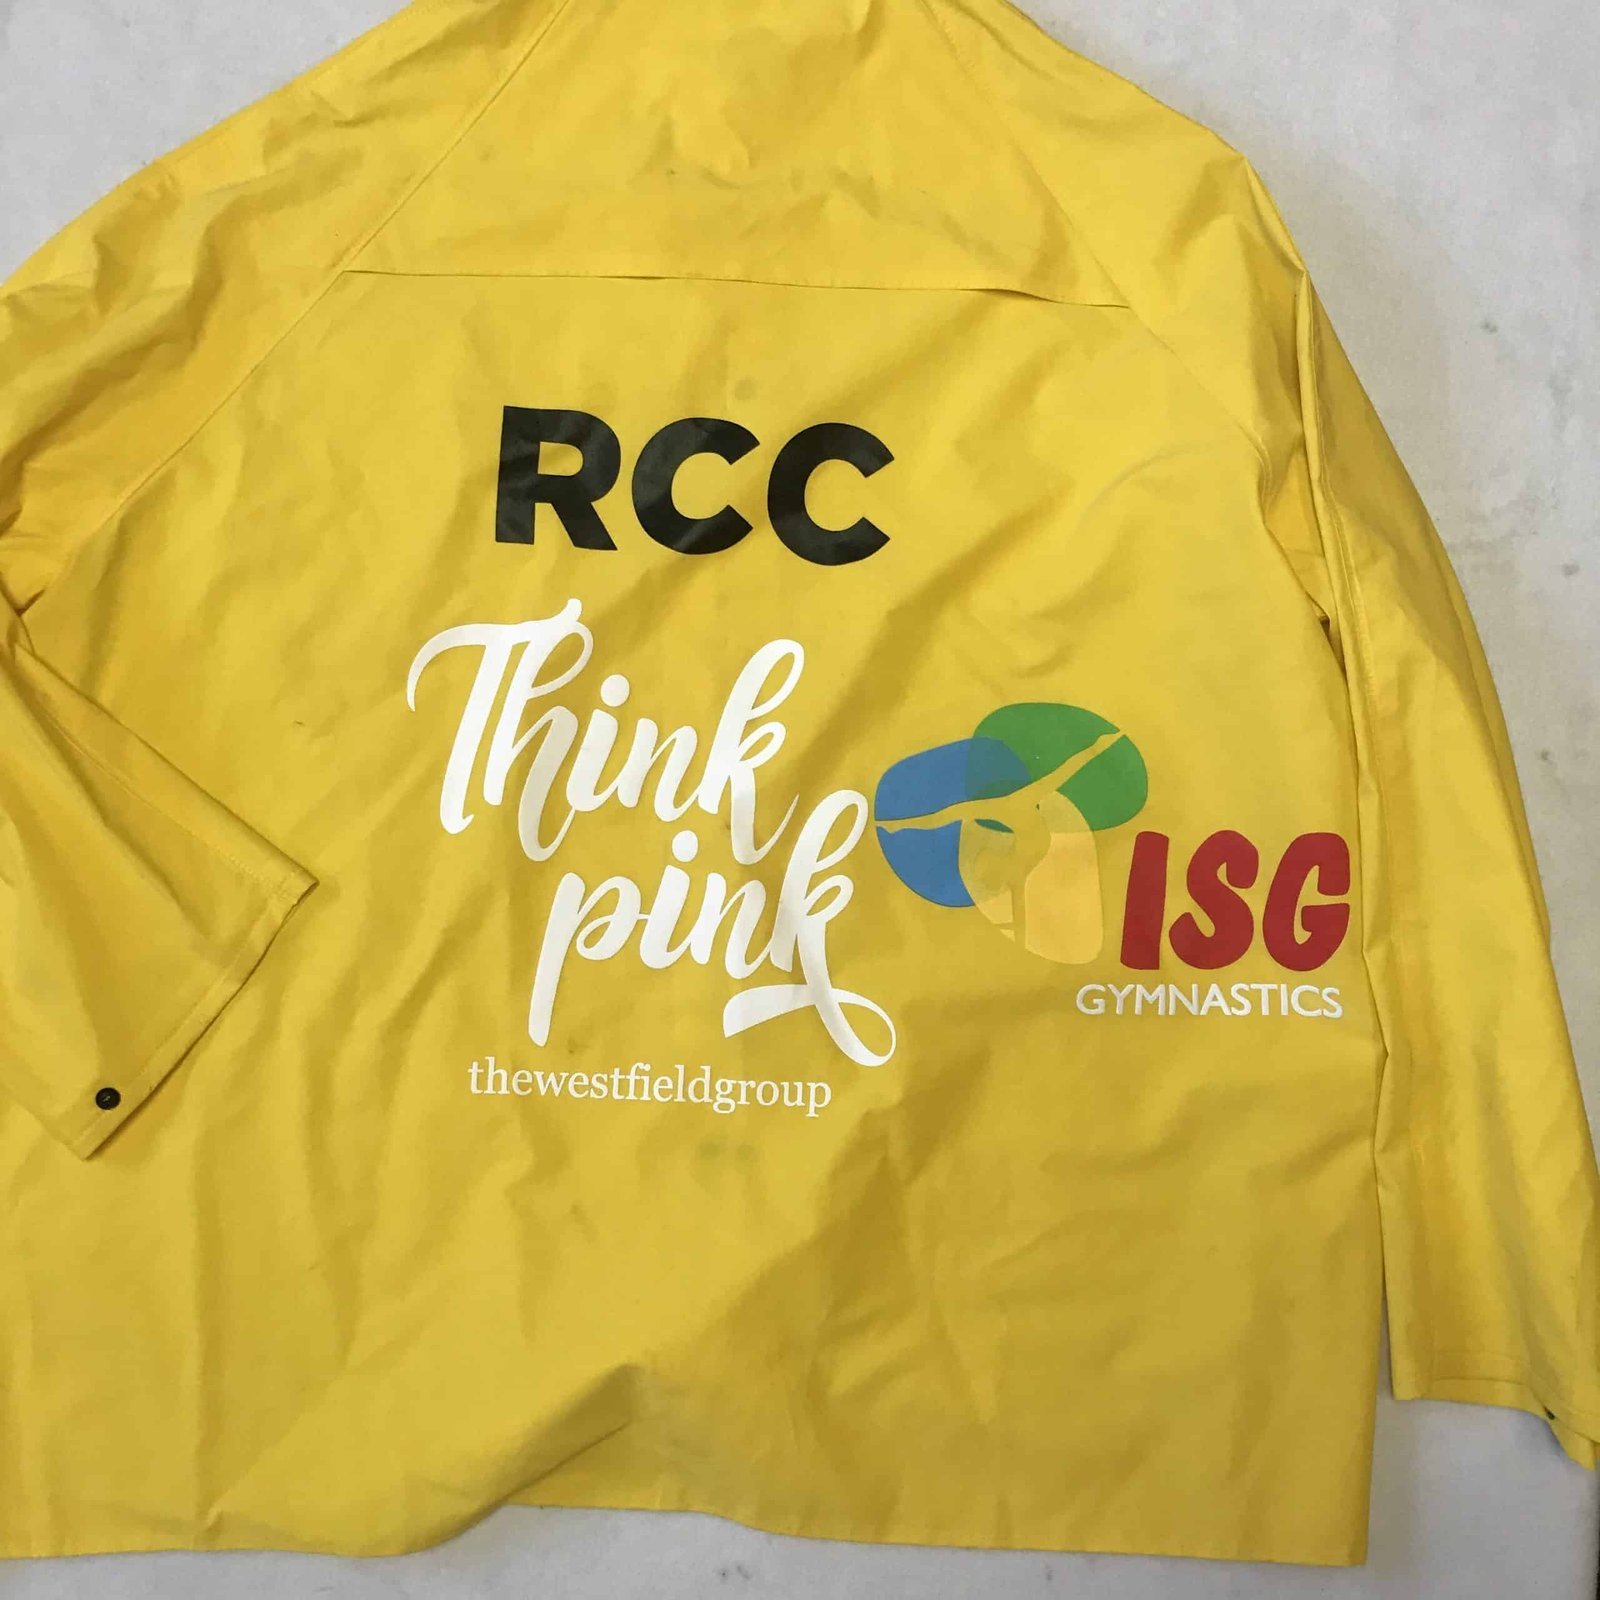
The art of printing
Printing goes beyond simply adding color—it’s about crafting a coat that tells a story. Whether through bold designs or intricate details, the right technique can truly make a difference.
Common printing techniques used for coats
1. Sublimation printing
Source: FARTECH
A fan of garments with an all-over print? Sublimation printing might be your go-to. Heating the ink until it becomes gas allows it to bond directly with fabric fibers. This method produces a vibrant, durable design that remains sharp, just like the day it was printed.
2. Screen printing
Source: Fusion180Ink
Bold designs need a method that delivers impact. Using a mesh stencil, screen printing pushes ink onto the fabric, resulting in vivid, saturated colors. It’s a tried-and-true technique, particularly cost-effective for large batches and ideal for making a statement.
3. Direct-to-garment printing (DTG)

Source: Tulio
Intricate patterns on your coat? That’s easy with DTG. DTG applies the design directly onto the fabric using an inkjet printer, capturing every detail with precision. This method allows for unlimited colors, making it ideal for complex and multi-colored designs.
4. Block printing
Source: Power Day Sale
Looking for something artisanal? Block printing brings a handcrafted touch to your coat. This traditional technique involves pressing a carved block dipped in dye onto the fabric, creating unique and artistic patterns with a personal flair.
Choosing the right printing technique hinges on the design’s complexity, fabric type, and production scale. Consult with your coat manufacturer to explore all options and find the perfect match for your design vision.
Different types of garment washing for coats
Washing techniques can completely transform a coat’s look and feel. These methods add character, soften the fabric, and even give it a vintage touch. Let’s explore the various garment washing techniques used in coat manufacturing.
1. Garment wash
Source: Bloomingdale’s
Think of garment wash as giving your coat a spa day. It involves industrial washing with softeners, making the fabric incredibly soft and giving it a naturally clean, cozy look.
2. Stone wash

Source: Carhartt
Looking for a laid-back, vintage vibe? Stone wash is your go-to technique. Tumbling the fabric with stones creates a worn-in feel and a faded look—ideal for that casual, lived-in charm.
3. Acid wash
Source: Khela
Acid wash brings bold, edgy style. Soaking in a bleach-acid mix creates a striking, uneven pattern. Ideal for a fashion-forward look, but use sparingly to avoid fabric damage.
4. Enzyme wash
Source: Country Outfitter
Enzyme wash breathes new life into fabrics with natural enzymes that gently soften and clean. Ideal for cotton and linen, it tackles odors and allergens while staying free of harsh chemicals.
5. Sand wash

Source: Rue de Tokyo
Sand wash creates a soft, textured finish. By treating fabric with alkaline, oxidizing agents, and sometimes stones, it adds a unique fluff and depth, enhancing the coat’s visual appeal.
6. Bleach wash
Source: ASOS
Want a coat with a lightened or worn-out effect? Bleach wash can do just that.Applying bleach lightens or patterns the fabric, giving your coat a distinctive, aged look.
7. Pigment wash

Source: MUSINSA
Pigment wash adds vintage charm with a washed-out effect. Pigment dyes on the surface create an irregular, weathered look, perfect for a coat full of character.
8. Destroy wash

Source: Neiman Marcus
A coat with a worn-out, rugged look? Destroy wash is the go-to. After stone polishing and treatment, fabric is intentionally distressed at joints and hems, achieving a unique, lived-in appearance.
Choosing the right washing technique can elevate the look and feel of your coat. Discuss these options with your coat manufacturer to find the perfect finish for your design.
Fabric dyeing technique for coats
Dyeing enhances a coat’s look and feel, adding unique effects and customization. Different techniques suit various dyes and fabrics. Here’s a glimpse into the methods used to add color and personality to coats.
1. Painting or hand painting

Source: Carole Waller
Custom designs? Hand painting offers precision on fabrics like wool, cotton, and linen. Using fabric paints, it creates unique patterns that make each coat one-of-a-kind.
2. Tie-dye

Source: Fashion Crossover London
Bold patterns more your style? Tie-dye uses scrunching and twisting before applying dye, creating playful, intricate designs that stand out.
3. Dip dye
Source: CLOTHBASE
For a gradient effect, dip dye partially immerses the fabric in dye. The color transitions, from light to dark or vice versa, add visual depth.
4. Silk painting

Source: Wolfensson
Silk demands care. Silk painting applies dyes directly onto the fabric, creating soft, watercolor effects while keeping the material vibrant and smooth.
5. Overdye
Source: La Garçonne
Want a new look? Overdye layers new dye over existing colors, adding depth and freshness to the fabric.
6. Natural dye
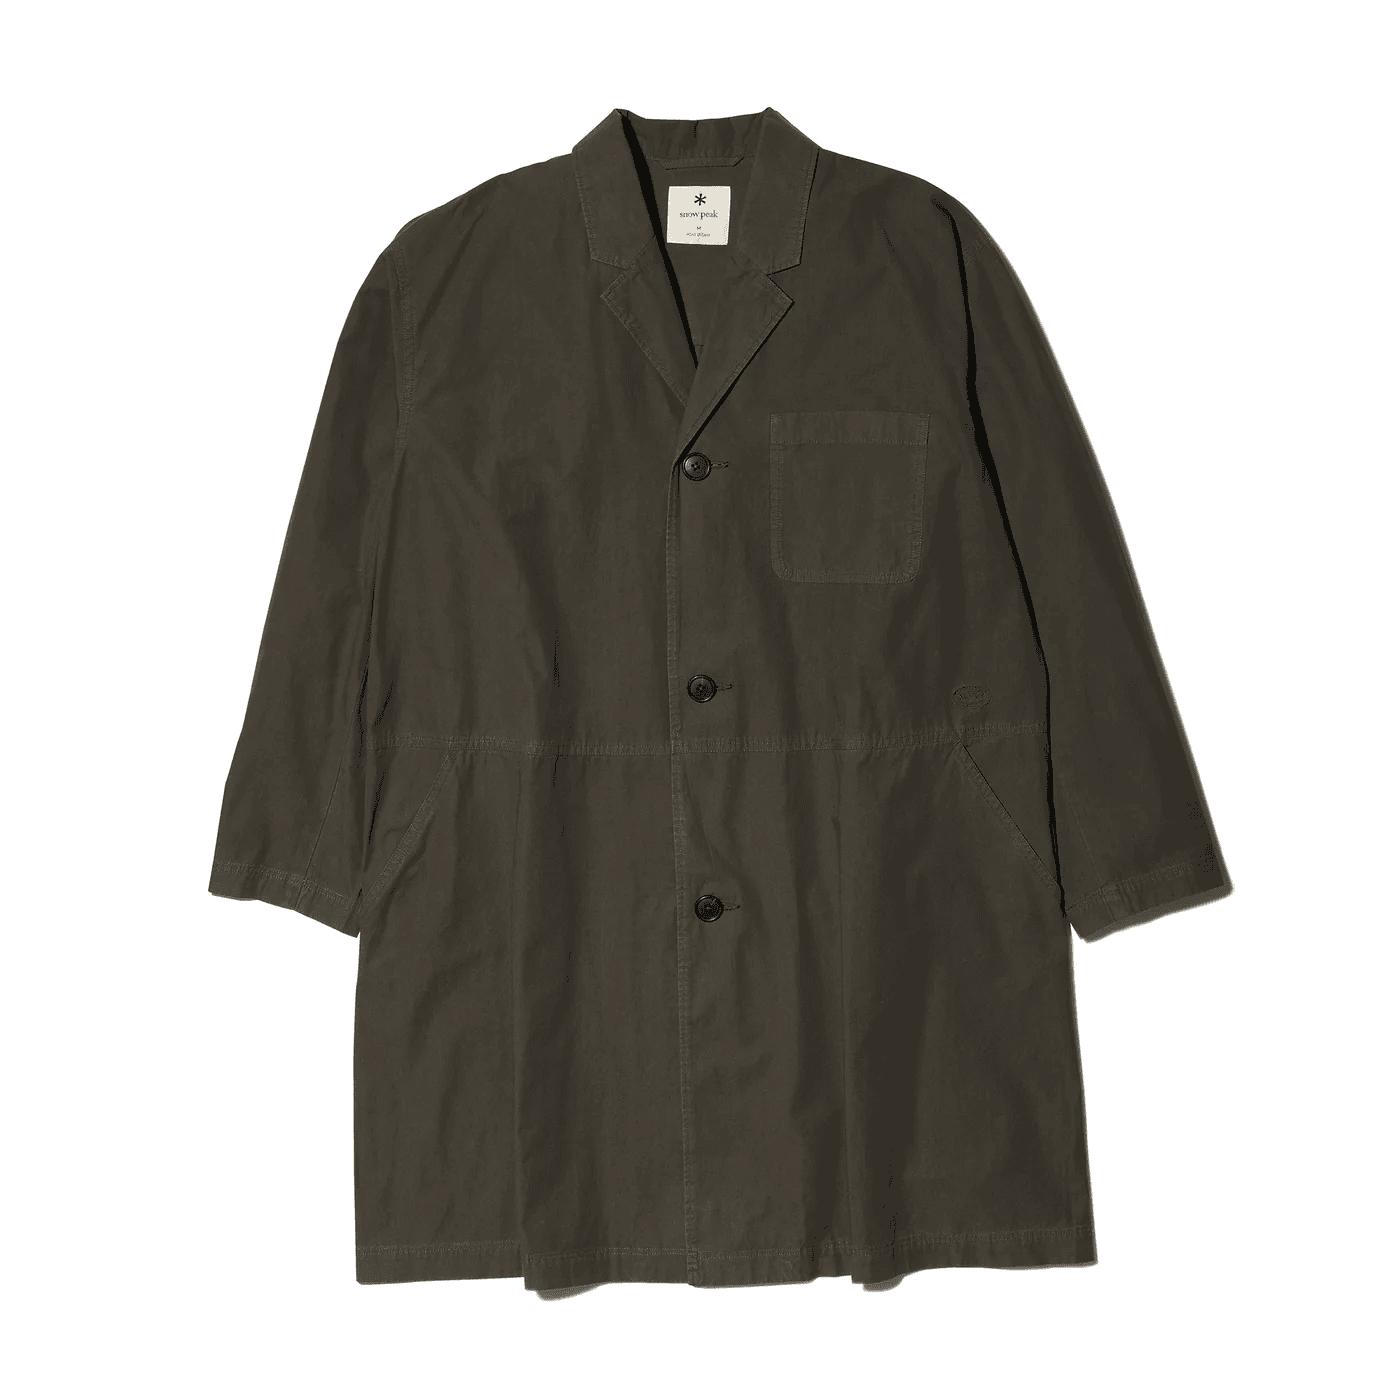
Source: Snow Peak UK
Rich, earthy tones are achieved through natural dyeing, which uses organic materials like flowers and leaves. Lasting colors emerge from these dyes, which add an organic touch to natural fibers. Expect your fabric to showcase rich, enduring hues.
7. Shibori

Source: Katayama Bunzaburo Shoten
Using Shibori—a traditional Japanese technique—fabric is bound, folded, or clamped before dyeing. Each technique results in unique, hand-crafted designs.
The dyeing process depends on your chosen dye and fabric. These techniques ensure your coat stands out with color and personality.
Quality control measures

Quality control is vital in coat manufacturing, ensuring every piece meets the highest standards. Precision and consistency are key, and here’s how we make it happen.
Standardized sizing
Consistency is everything. We use standardized size charts to guide each stage of production, from cutting to sewing. This ensures that sizes like Small, Medium, and Large are uniform across every batch, providing a reliable fit.
Final inspection and adjustments
Once a coat is assembled, it undergoes a meticulous fit inspection. Shoulders, bust, waist, hips, and sleeves are carefully measured against the intended dimensions. If needed, we make minor adjustments to guarantee a flawless fit, meeting both our standards and customer expectations.
Production consistency
Every batch, every time—consistency is crucial. We closely monitor all variables, from fabric batches to cutting tools, to prevent any discrepancies. This strict control ensures that each coat fits as intended, maintaining the quality our customers expect.
By maintaining these quality control measures, we ensure that our coats deliver the perfect fit, enhancing customer satisfaction and reducing the chance of returns.
Packaging and branding

Source: Pinterest
Packaging and branding go beyond final touches—they play crucial roles in shaping the customer’s experience and perception of your product. These elements are essential for creating a memorable impact. Here’s how we handle these key elements.
Wrapping up in style
Presentation is just as important as protection when it comes to packaging. The way your product is packaged significantly influences the customer’s initial impression.
Material selection
We use high-quality materials like tissue paper, garment bags, and breathable fabric covers to keep coats pristine during storage and shipping. The packaging is carefully chosen to fit snugly, avoiding creases and damage.
Labeling and tags
Attention to detail matters. We include branded tags inside the coat, highlighting the brand name, size, and care instructions. Prominent size labels ensure customers get the right fit, while care labels help maintain the coat’s quality.
Crafting your brand’s identity
Branding goes beyond the product—it’s about creating a lasting impression.
Brand identity
A well-designed logo, whether embroidered on the coat or printed on labels, reflects your brand’s values. Each coat features tags and labels that emphasize your identity, including sustainability or special materials.
Customer experience
The unboxing experience is crucial. Custom-branded packaging and personalized notes create a striking first impression. Uniform branding across digital and physical platforms solidifies your brand’s identity and delivers a smooth, cohesive customer experience.
Pairing robust branding with careful packaging elevates your product. This strategy not only attracts attention but also ensures long-term success and a memorable impact.
Conclusion
Creating a custom coat involves choosing the right fabric, perfecting the design, and ensuring excellent construction. Each step is vital for making coats that are both stylish and highly functional.
To find the right custom coat manufacturer for startups, seek a partner who aligns with your brand’s vision and values quality, consistency, and creativity. It’s about finding a collaborator, not just a factory.
Eager to see your coat designs come to life? Connect with us to transform your ideas into stunning reality. Let’s create something extraordinary together—reach out now!